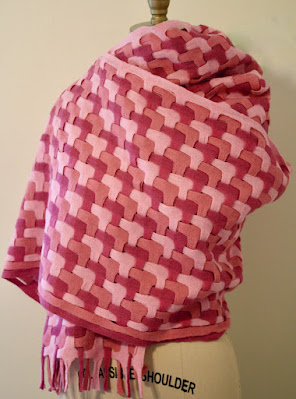
I have been working on this piece for lo, these many years, ever since I saw a photo on Pinterest with a draft that I still can't figure out. Perhaps it involves actually cutting out some of the warp blocks -- I'm talking scissors here -- to achieve the difference between the upper and lower sections of the fabric.
I know how to design the top portion of the fabric and I know how to design the bottom portion of the fabric. But how do you weave a design that incorporates both? If you look closely, you will see at the top of the photo that some of the warp blocks just disappear. I love the ingenuity of this, but I'm not prepared to weave the many, many samples required to get it right.
Around the same time, I came upon a couple of photos of work by the late, great Sandra Rude.
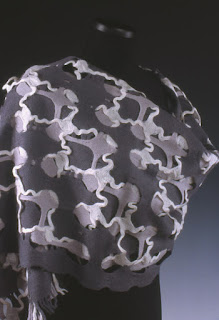

Above scarves woven by Sandra Rude
I spent a long time working out the threading, tieup, and treadling for the second piece and, long story short, here is what I came up with. It calls for 20 shafts.

Although I have a loom with 32 shafts, I didn't want to replicate Rude's lovely design -- rather, I wanted to create one of my own, hopefully as interesting, but with a clearer pattern. So here is my version of a deflected-double-weave puzzle, calling for just 6 shafts:
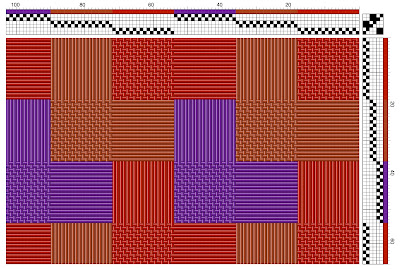
Here's what the full drawdown looks like:
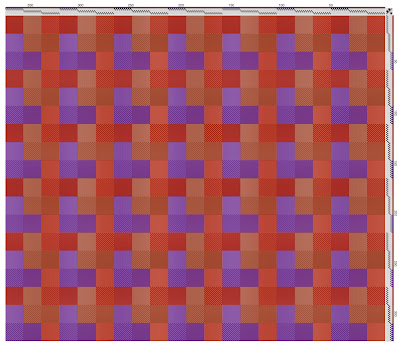
It looks quite simple to weave, right?
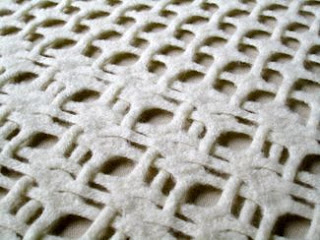
Absolutely not, especially if you want to full the fabric, as I did (to reduce problems with the long floats and make the layers more distinct). I won't give you the long list of my missteps, but here's just one of the samples that didn't work.
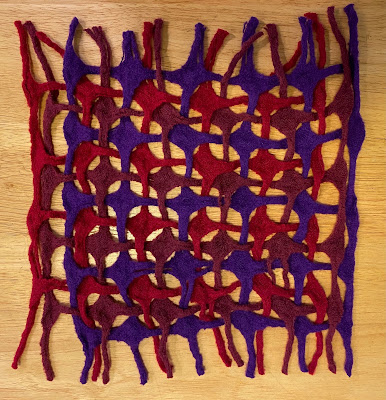
Note that there are two warp blocks on each selvage that appear to be spaced farther away from the other blocks. Actually, the sett is the same throughout: 18 epi for 18/2 merino. The problem lies with the process of fulling itself, which stretches the outer layers away from the others.
Details: The warp blocks were 18 ends each. The sett was 2 ends per dent in a 12-dent reed for 9 dents and then leave 3 dents empty and repeat. I had to weave the weft blocks in a similar fashion, which called for a very careful, gentle beat.
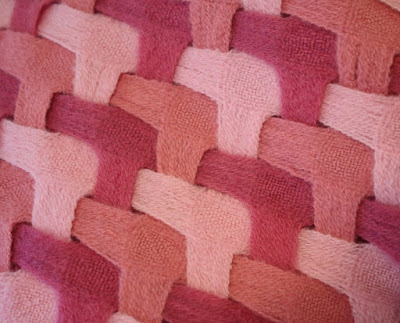
In my view, the above sample looks like some kind of netting. So I put on another, longer warp and decided that I would first create more samples and then weave a long scarf once I got it right. For this next set of samples, I spaced the two warp blocks on either selvage just one dent apart, leaving the remainder of the blocks 3 dents apart as I did with the first sample.
Here's how that looked (you can't really see the blocks at the selvages -- but they're better, trust me):
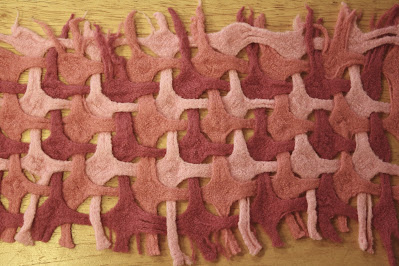
Better, yes, but still not what I was going for. I wanted a softer, flatter appearance, somewhere between the gauzy fabric you'd get if you didn't full it at all and the rope-like, corded fabric you see above. Finally it dawned on me: I needed to talk to a felter! Felters know a lot about what you might call the Goldlilocks Effect, making sure their fabric is not too stiff yet not too gauzy.
And this is what fiber friends are for. So I called up Marie Brate, a talented felter in our guild, and asked her to give me some pointers. Marie brought over some bubble wrap and showed me how to keep the fabric flat and add just enough soapy water to encourage fulling.
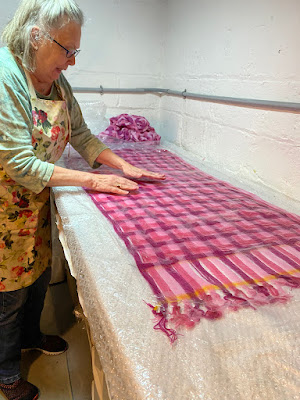
Marie Brate to the rescue!
Sometimes I feel like it takes me a long time to figure things out -- to realize that this shawl called for skillful weaving AND skillful fulling. Prior to having this seemingly obvious insight, I would simply agitate a piece like this in the washing machine or by hand. I've learned that this creates a much denser look. There is a place for that, but not for a scarf that I want to wear.
Turns out the finishing was harder than the weaving itself. It took hours, mainly because I wanted the details to be just right, which included separating every layer at every juncture by hand.

I went through this entire process once and saw that the fabric truly needed more fulling. So I washed and fulled it again -- and then I had to separate each and every layer again, by hand.
It was worth it, however, because I'm happy with the results.
Thanks for reading!
3 comments:
Denise, the shawl looks wonderful - just the right amount of fulling. I appreciate someone who puts the time in to get the result they want.
My first thought on the photo from pinterest is that the warp runs across the photo (rather than top to bottom). And that half the warp has two layers, then the third layer is added for the other half of the warp (the bottom half of the photo).
Linda, of course! This piece is woven sideways (in terms of the photo). This is the second time I've been fooled by a piece like this -- where what looks like warp is actually weft and vice versa.
That would be the most logical explanation. Thanks for your insight. I was just on the phone tonight with Mike Rude, Sandra's husband, and he referred to a piece (all white, layers, fulled) that perplexed her. I wonder if it was this one.
That was amazing to read! I have wanted to create one of those scarfs but didn’t understand the process to keep the layers apart. Thank you and Thank you to your guild friend Marie!
Post a Comment