Wednesday, May 28, 2014

Shibori with Osage Orange, Indigo, and a Bit of Cochineal


The fabric is a cotton/linen jersey I bought from Mood (the official fabric store for Project Runway) in New York City. Above, a detail that shows a color I take great pride in: turquoise! It doesn't appear throughout, of course, but if you look at the shading on the perimeter of the golden rectangles, there it is. Turquoise is hard to achieve with natural dyes, at least for me, and yet it's one of my favorite colors.

"Sawdust, Leaves and Bugs" is what I like to call the combination, and it's the title of a course I hope to teach soon at the Weaving and Fiber Arts Center. First, I immersed the entire fabric in a vat of osage orange dye, purchased from a friend, David Barnet, who is a master woodworker with the Rochester Folk Art Guild. (For more on this talented group of people, click here.) Second, I did some tying and clamping -- using techniques that are jokingly called "dirty shibori" -- before immersing it in a vat of cochineal. In this case, the cochineal wasn't as bright, perhaps because I used the vat once before: It doesn't really show up on this fabric, other than lending a red-gold hue in the center of the rectangles above.

The last and best part, of course, was to dip the fabric five times in an indigo vat. Before dipping, I used a number of shibori-resist techniques: arashi, where I wrapped and tied it around a piece of PVC pipe; knotting, in which I simply tied four overhand knots in a length of fabric; folding and clamping with rectangular blocks of wood; and folding and securing with closepins.

My favorite results are on the back (pause for snarky comment: of course), where I used the arashi-shibori technique of wrapping the fabric around a PVC pipe and then tying with cord.

 This is the back of the garment

A closeup of the back, showing that elusive turquoise

I made another top, using similar techniques, and the results were completely different. My thinking is that the amount of fabric exposed to the dyes was very different in the two garments, which meant that the color blending was entirely different as well.


Sawdust, leaves, and bugs yield wonderful results! Thanks for reading!

Saturday, May 10, 2014

Here's the Coat I Wove with S and Z Overtwist


This coat is woven with handspun overtwist singles, as I wrote about a couple of posts ago. (I did not include the blood, sweat, tears, and toil that went into it as well....)

Three kinds of wefts made three different fabrics: the checks on the front used both gold and burgundy as weft yarns, while the back was woven with only the gold yarn as weft. Which you see here.


The sleeves and inside front panel used burgundy yarn as weft -- shown below.


I am loving this coat! The fabric collapses and crinkles wonderfully, adding flexibility and interest to the garment, which is my own design. (Partly out of necessity, because I barely had enough fabric to make a jacket, let alone follow a pattern.)

I knitted the color using a brioche stitch from Barbara Walker's first volume of knitting stitches and added a Dorset button for a decorative closure. It isn't really used as a button, because I secured it with a sturdy hidden snap -- which I prefer on fabric like this, because it's hard to create a buttonhole that doesn't stretch and distort the fabric somewhat.

It's for sale in my Etsy shop, but I am not so sure that, ultimately, I won't keep it for myself. Those are the perks of making your own garments: If you like it, it CAN be yours!


Friday, April 18, 2014

Teaching Weaving and Shibori with Natural Dyes: A Workshop at Parsons in NYC

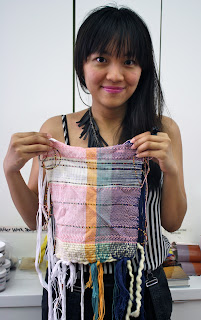
Above, first weaving ever by Fatimah Fahmy 

A couple of months ago my friend Joy Duskin asked me to team teach with her at Parsons School of Design in New York. Our task was to work with students of Professor Luciana Scrutchen, a good friend of Joy's, introducing them to weaving and shibori with natural dyes. Hard to say no! "Lucci," as she prefers, had rented space at the Textile Arts Center in Greenwich Village so that we would have access to looms and a dye kitchen.

Left to right: Fatima Fahmy, Joy Duskin, and Lucci Scrutchen 

We spent all day Saturday prepping looms (sigh) and working with students to make sure all 12 of them completed a 12-inch sample on the loom. Because they were students in fashion design, it seemed to me, they couldn't keep themselves from designing as they wove. Every sample was different and everyone played with a variety of yarns to achieve interesting textures and colors. Below are a few examples of what they did.

Solange Parris with her first weaving

Agatha and her first project

Han Ling and Rachel Chen with a sample they wove together

The plan was for everyone to weave a 12" sample using the woven shibori techniques of Catherine Ellis and then to dye them the next day with natural dyes. One slight problem: everyone was so pleased with their sample that they refused to risk dyeing it! OK, on to Plan B: Have them dye fabric as well, using shibori techniques like stitching and pole wrapping (arashi shibori).

A piece of cotton muslin, stitched and wrapped around a pole and dipped in a vat of madder 


A couple of Lucci's fellow faculty members joined us to do some natural dyeing. Above:
Julia Poteat and one of her shibori samples using madder, indigo, and cochineal

Joy, who holds an M.F.A. from Rochester Institute of Technology, 
brought along an extensive collection of shibori samples.

Joy demonstrated how she achieved an accordion-fold with one sample, first folding it in pleats and then wrapping the folded piece around a pole before dipping it in an indigo vat. Beautiful texture and surface design!


One editorial comment: Parsons does not, at this point, have classes in hand-weaving or hand-dyeing -- but, judging from the enthusiasm and natural talent of the students, I do hope that it does sometime in the near future! Thanks so much to Lucci and Joy for inviting me. I believe I learned much more than I taught. To find out more about the Textile Arts Center, which has a studio in Manhattan and a larger one in Brooklyn, click here. And to learn more about Parsons School of Design, click here.

Thursday, March 27, 2014

Weaving with Overtwisted Handspun Singles: It Only LOOKS Hard


I repeat: It only LOOKS hard. The photo above shows a warp chain of overtwisted handspun singles. I used Ashland Bay's multicolored Merino roving in Mojave and its Colonial (Corriedale) roving in Goldenrod (no longer available, I believe). I am not a whiz-bang spinner, but I can do overtwist! I spun two different yarns, both approximately sport weight, with the Goldenrod in Z-twist and the Mojave in S-twist.

Why go to all this trouble? I love fabric that has loads of texture and personality, with yarns that misbehave in wonderful ways after washing. Although I haven't yet made a garment out of the fabric that I'm weaving (most of it is still on the loom), here is what the finished product looks like.


And here.


I love the pleats and bumps and the tracking, which you can see pretty clearly in the photo. To achieve this effect, I wound a warp of stripes in S and Z twist: 8 ends of Z (Goldenrod) and 8 ends of S (Mojave). Then, for the example above, I wove plain weave with a Z-twist weft. And then washed it. 

Just to clarify: S and Z twist refer to the direction of the plying or spinning of a yarn.


Here's what the fabric looked like just off the loom, before washing.


Even before I put it in hot water, it had a mind of its own:


I can't quite figure out why it's creating a Z twist, other than the fact that the Mojave yarn (red, spun in S-twist) seemed to have more energy than the Goldenrod. Just a theory.

If you want to know more about how I wove this fabric, what follows is a brief tutorial. For starters, pay no attention to the twisting and turning of the yarns in the warp chain. Treat them just as you would any others.


The warp starts to look more orderly once you've inserted the least sticks, so:


It looks even better when you tighten the heck out of the warp as you're beaming it:


Threading: Well, the yarns insist on maintaining their original twist when you're threading them and after threading as well. So you have to be very patient with them!


It all works out in the weaving, which creates a pretty conventional-looking cloth, as you saw at the beginning of this post. After washing -- well, as Laura Fry aptly titled her book, there's "Magic in the Water"!

One postscript: This June I will be flying to London to study with Ann Richards at the Handweavers Studio and Gallery. She is the author of "Weaving Textiles That Shape Themselves" and she is inspirational! I hope to take many photos and post a lot of good information after I return.


Sunday, February 16, 2014

Collapse Weave Coat in 60/2 Silk Twill Blocks: Before and After Washing

Here it is before washing...

And after! The fabric "shrinks" width-wise by more than half. (OK, the closure
was not a result of the washing, but you have to have an embellishment, right?)

Here's the back view before washing...

And after.

It's almost as if you can wear this coat two ways. If you want it flat and larger, all you have to do is iron out the pleats. If you want it smaller and elastic, just wash it in warm water and a bit of soap. No iron, of course.

Collapse weave, in this case, is a result of both structure and materials. I used a 60/2 silk weft, threaded on 8 harnesses in 3/1 and 1/3 twill blocks, so that the weft floats pull the warp in lengthwise, just as a matter of physics.

Usually you have a weft that is much finer than the warp, which gives the yarns "wiggle room" to move readjust and collapse warp-wise. In this case, I pushed the collapse effect further by using super-fine weft yarns of overtwist wool, which twists and turns every which way, even before it's washed. The two yarns varied a bit in their effect. I purchased an overtwist wool from Habu Textiles in New York City and a Z-twist wool from the Handweavers Studio and Gallery in London.

Sounds technical, but it's easy to see when you weave it. On the loom, these fabrics look normal (as with the two "before" photos) and flat. But in washing, they change almost immediately. 

Here's a closeup of the fabric after washing.


I added a lettuce-edge by sewing a three-thread rolled hem on my serger around the shawl collar, hem, and cuffs to emphasize the collapse effect. The warp is hand-painted in two color ways, sort of a dark chocolate and a pale blue/aqua/sage. To my eye, the color changes add to the ever-shifting stripes. I call this coat "Fascinatin' Rhythm" in honor of George Gershwin's song.

The flower closure was added later on. It's a hand knitted flower using a hand-dyed bias-cut Habotai silk ribbon from Dharma Trading. Czech glass beads from Let's Bead in East Rochester, NY -- right near the Weaving and Fiber Arts Center. How many links can I get in here?!

Saturday, January 11, 2014

'Fabrications: The Art of Fiber' at the I-Square Gallery, January 13-February 6


Featuring works by 17 artists from the Weavers' Guild of Rochester -- including me. The I-Square Gallery is at 693 Titus Avenue in Irondequoit (just a few businesses east of the House of Guitars) and the exhibit is free and open to the public. Most of the items on display will be for sale, including these:

Hand-dyed top in silk/rayon velvet

Vest in hand-dyed silk/rayon velvet with silk dupioni back panel

Cotton tunic with shibori dyeing in walnut

Kimono in shibori-dyed Habotai silk

The hours are Monday through Thursday, 10 a.m. till 2 p.m., and Saturday 11 a.m. till 2 p.m. Email me at dkovn@hotmail.com or Zanne Brunner at zannebrunner@gmail.com for more information.

An opening reception takes place on Friday, January 17, from 7 till 9 p.m. And a postscript: There will be trunk sales! More information to come.

Friday, January 3, 2014

Collapse Weave: I Finally Realized the Error of My Ways

And I really like it!

The photo above shows some collapse-weave fabric, just taken off the loom and washed, that clearly has two distinct textures. If you look closely, the top 1/3 of the piece is slightly more dense and darker in color, with an emphasis on the dark stripes. The section at the bottom 2/3 of the photo features the blue/green stripes and is slightly looser and broader.

Why? It took me a while to figure this out. Simply put, I changed the weft -- and thought that there would be little difference in the outcome. The warp is hand-painted 60/2 silk and the weft is a super-fine overtwist wool. The difference: the weft used at the top of the photo was a 2-ply overtwist wool from Habu. The weft at the bottom of the photo was a Z-twist wool from the Handweaver's Studio and Gallery in London. BIG difference between the two and I intend to exploit this when I make the garment.

Here are a few more views:

 The fabric when it's dry
 Closeup of the same
And here's the back

And so I learned, from a process of trial and error (emphasis on error), that yarns of the same color, fiber, and grist can behave very differently, depending on whether they're plied, singles, Z twist, or S twist. As a spinner, I know this. As a weaver, it took me a while to know this!

Here's one more view of the fabric, still drying. I like to call it "Colorado Creek Bed," remembering the gorgeous scenery in Colorado, where we just spent our Christmas holiday with my daughter and her fiance.


Name Drafts Aren't Just for Overshot....

  Above is a name draft using -- why not? -- the name Michelangelo, employing an Echo threading and a twill tieup and treading. A name draft...