Showing posts with label fulling. Show all posts

Friday, January 6, 2023

Book Launch!

Weaving Outside the Box: 12 Projects for Creating Dimensional Cloth is now available for purchase! It's been a long road but at last it's ready to launch.

Front and back covers (right and left respectively) for printing

The book is 122 pages long, in full color, with a soft cover and a coil binding so that you can lay it flat as you read and weave. It's also available as an eBook and in hardcover. You'll find all these options on this blog site under the page titled "Publications for Purchase".

Here's a brief description:

"Color and structure are key elements in weaving, of course. But we often overlook the importance of texture. Dimensional fabrics, with their pleats, puffs, and curves, take us 'off the grid', reflecting the organic forms of nature. We can both see and feel the tactile quality of dimensional cloth, which adds much to the beauty of handwoven fabric.

"This book gives you tools to optimize texture in your weaving. Starting with background on the techniques involved, it then offers step-by-step instructions for 12 projects for four to 16-shaft looms: four for beginning weavers, four for intermediate weavers, and four for advanced weavers. As a bonus, there are two patterns that allow you to weave three different projects on a single warp.

"Weaving Outside the Box provides the tips and resources you need to move beyond the two-dimensional plane and rectilinear patterns of warp and weft."

Here are a few of the projects offered.

Among the four projects for four shafts: woven shibori using fulling techniques


Doubleweave layers and ruffles for eight shafts 
using differential-shrinkage techniques


Deflected doubleweave on 16 shafts 
using differential-shrinkage techniques

There are diagrams and even microscopic photos of yarn throughout the book, to help you understand the mechanics behind these designs, all using some combination of active and inactive yarns, structure, and finishing.


I will teach a workshop straight from the book June 11-16 at the Michigan League of Handweavers Conference in Holland, MI. Participants will choose one of the 12 projects from the book and start by weaving up samples so they can learn how to finish their projects to get just the right textured effects.

Dimensional cloth is a specialized area of weaving, one that is sometimes overlooked but has been woven for centuries. My book begins -- and this blog post concludes -- with this quote from Anni Albers, from her definitive book, On Weaving. 

All progress, it seems, is coupled to regression elsewhere. We have advanced in general, for instance, in regard to verbal articulation -- the reading and writing public of today is enormous. But we certainly have grown increasingly insensitive in our perception by touch, the tactile sense.

I hope my book inspires weavers to explore all three of the wonderful tools we have in our craft: those of structure, color, and the tactile sense.

Thanks for reading!


Detail of Echo threading in four-color doubleweave on 28 shafts, 
using cotton/stainless-steel yarn for one of the wefts 
to achieve crinkled layers


Thursday, December 16, 2021

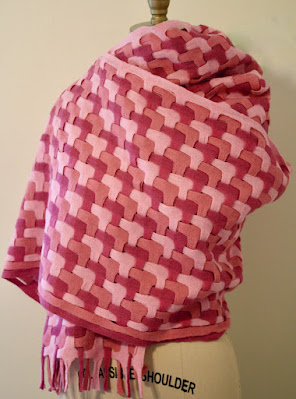
Three-Layer Puzzle Scarf: Less Complex Than It Looks!


I have been working on this piece for lo, these many years, ever since I saw a photo on Pinterest with a draft that I still can't figure out. Perhaps it involves actually cutting out some of the warp blocks -- I'm talking scissors here -- to achieve the difference between the upper and lower sections of the fabric.


I know how to design the top portion of the fabric and I know how to design the bottom portion of the fabric. But how do you weave a design that incorporates both? If you look closely, you will see at the top of the photo that some of the warp blocks just disappear. I love the ingenuity of this, but I'm not prepared to weave the many, many samples required to get it right.

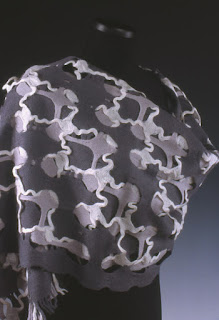
Around the same time, I came upon a couple of photos of work by the late, great Sandra Rude. 


Above scarves woven by Sandra Rude

I spent a long time working out the threading, tieup, and treadling for the second piece and, long story short, here is what I came up with. It calls for 20 shafts.


Although I have a loom with 32 shafts, I didn't want to replicate Rude's lovely design -- rather, I wanted to create one of my own, hopefully as interesting, but with a clearer pattern. So here is my version of a deflected-double-weave puzzle, calling for just 6 shafts:


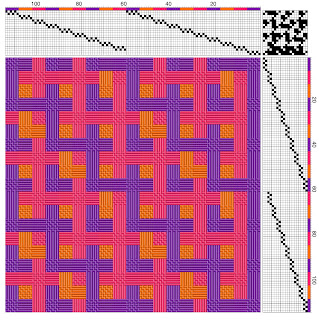
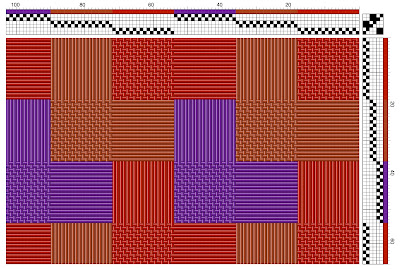
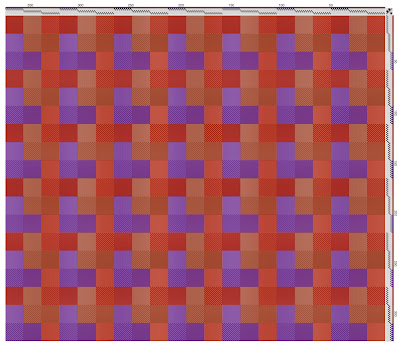
Here's what the full drawdown looks like:


It looks quite simple to weave, right? 

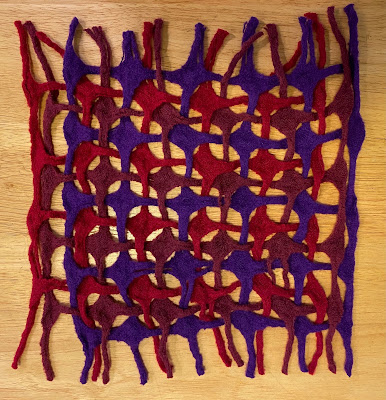
Absolutely not, especially if you want to full the fabric, as I did (to reduce problems with the long floats and make the layers more distinct). I won't give you the long list of my missteps, but here's just one of the samples that didn't work.


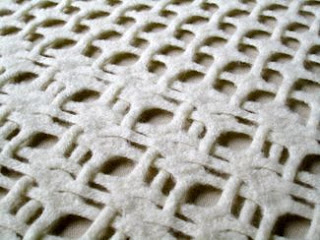
Note that there are two warp blocks on each selvage that appear to be spaced farther away from the other blocks. Actually, the sett is the same throughout: 18 epi for 18/2 merino. The problem lies with the process of fulling itself, which stretches the outer layers away from the others. 

Details: The warp blocks were 18 ends each. The sett was 2 ends per dent in a 12-dent reed for 9 dents and then leave 3 dents empty and repeat. I had to weave the weft blocks in a similar fashion, which called for a very careful, gentle beat.

In my view, the above sample looks like some kind of netting. So I put on another, longer warp and decided that I would first create more samples and then weave a long scarf once I got it right. For this next set of samples, I spaced the two warp blocks on either selvage just one dent apart, leaving the remainder of the blocks 3 dents apart as I did with the first sample. 

Here's how that looked (you can't really see the blocks at the selvages -- but they're better, trust me):


Better, yes, but still not what I was going for. I wanted a softer, flatter appearance, somewhere between the gauzy fabric you'd get if you didn't full it at all and the rope-like, corded fabric you see above. Finally it dawned on me: I needed to talk to a felter! Felters know a lot about what you might call the Goldlilocks Effect, making sure their fabric is not too stiff yet not too gauzy.

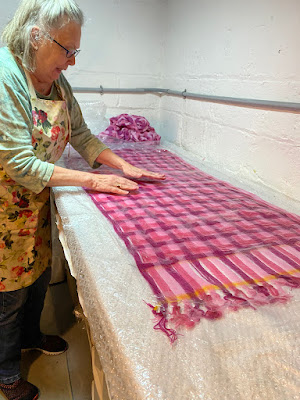
And this is what fiber friends are for. So I called up Marie Brate, a talented felter in our guild, and asked her to give me some pointers. Marie brought over some bubble wrap and showed me how to keep the fabric flat and add just enough soapy water to encourage fulling.


Marie Brate to the rescue!

Sometimes I feel like it takes me a long time to figure things out -- to realize that this shawl called for skillful weaving AND skillful fulling. Prior to having this seemingly obvious insight, I would simply agitate a piece like this in the washing machine or by hand. I've learned that this creates a much denser look. There is a place for that, but not for a scarf that I want to wear.

Turns out the finishing was harder than the weaving itself. It took hours, mainly because I wanted the details to be just right, which included separating every layer at every juncture by hand.


I went through this entire process once and saw that the fabric truly needed more fulling. So I washed and fulled it again -- and then I had to separate each and every layer again, by hand.

It was worth it, however, because I'm happy with the results. 


Thanks for reading!


Sunday, November 21, 2021

A New Book from Ann Richards: 'Weaving Structure and Substance'


This is a case where you can judge a book by its cover: One, it's written by Ann Richards, a weaver who for decades has achieved a singular beauty in her work. And two, the photo itself captures you, presenting a detailed image of her elegantly constructed "origami" cloth.

The text and photos do not disappoint. Richards, who trained as a biologist before studying weaving at the West Surrey College of Art and Design (now the University for the Creative Arts, Farnham), brings her skills of scientific analysis and her love of nature to bear on her art. In Chapter 1, "Endless Forms Most Beautiful," next to sketches of a dragonfly wing detail and a cross section of its edge, she shares a photo of one of her pleated fabrics. (All photos and images are provided courtesy of Ann Richards.)


Sketch, detail of a dragonfly wing

Cross-section, the front part of the wing


Detail of a pleated fabric woven by Richards, with the caption:
"Warp: Linen. Weft: Crepe silk and hard silk, 
with picks of linen at intervals 
serving as 'struts' to stiffen the pleating."

If you were to look at a cross-section of the woven fabric, you would delight in seeing that the pleats are quite similar to those of the dragonfly wing. 

"Weaving Structure and Substance" is not a how-to book, although it does offer instructions for designing, materials, and finishing. Foremost, it's a discussion and analysis of how Richards and other weavers she admires create their work. The book has four parts: "Nature as Designer," "Resources for Design," "Designing for Fabric Qualities," and "Designing Through Making." There are chapters devoted to fibers and yarns, structures, the quest for textural qualities and forms, sampling, and the notion of "reflective practice." Further, there is an extensive bibliography as well as a list of online resources and suppliers.

The photos are inspirational. Below is a piece she calls "Soft Pleat Scarf," showing both the front and the back. She offers these details: "This silk and linen scarf has a striped effect created by the reversal of the pleats. The weft colour remains the same throughout so this is a 'structural' stripe that disappears when the fabric is stretched to its full width. Warp; Linen 77 lea, 72 epi and spun silk 60/2 Nm, 54 epi. Weft: Spun silk 210/2Nm, 48 ppi."


The delicacy, refinement, and simplicity of this piece represents the highest level of planning, design, and resolution. And yet the concept is easy to grasp: The shifting blocks -- seen in the thin horizontal white and black stripes -- are achieved by reversing the structure from the back to the front, requiring two blocks in the threading.

It is her depth of understanding and ability to exploit the unique potential of her materials that produce such inimitable designs. Appropriately, she quotes Darwin: "Whilst this planet has gone cycling on according to the fixed law of gravity, from so simple a beginning endless forms most beautiful and most wonderful have been, and are being evolved."

Richards's signature pieces are necklaces, collars, and bracelets with origami folds.
Her caption: "These triple spiral bracelets are assembled 
from offset sections of pleated fabric. Warp: Silk/steel 82/2 Nm (pleats) 
and spun silk 60/2 Nm cords). Weft: Crepe silk and polyester reflective yarn."

This is Richards's second book from Crowood Press, her first being the best-selling Weaving Textiles that Shape Themselves. As with the first, her new book includes lavish photos of her work and that of Wendy Morris, Stacey Harvey-Brown, the late Junichi Arai (founder of Nuno), and many others (including me, I'm proud to say). 

Note: I think by now you can guess I'm a huge fan -- to the point that about six years ago I traveled to London to study with her at the Handweavers Studio and Gallery. Her cordiality and relaxed demeanor belied the energy, observation, and creativity she brings to her work.

Dimensional, tactile weaving is a sub-category of weaving that spans broadly, from fulled fabrics to Leno gauze to exploiting the properties of specialized yarns such as crepe, overtwist, and elastic, to name a few. I highly recommend this book to weavers who are interested in what can broadly be termed "dimensional weaving" -- and also to those who are keen to learn more about how attention to materials and structure can improve their work.

WEAVING STRUCTURE AND SUBSTANCE by Ann Richards. The Crowood Press, Ramsbury, Marlborough, Wiltshire, SN8 2HR, United Kingdom. Hardcover. 175 pages. $32.45.

Oh yes, and if you happen to be in London between now and February 2, 2022, be sure to stop by the Handweavers Studio and Gallery at 140 Seven Sisters Road. There, you'll be able to see first-hand what these techniques can achieve. 


Tuesday, May 18, 2021

Vive la Différence -- with Differential Shrinkage


Top photo: handwoven cloth in loom state

Bottom photo: detail of cloth after finishing

"Loom state" describes fabric that has not yet been finished or dyed. In the textile industry, such fabric is also called "gray" or "griege." 

The finishing process is particularly important to weavers because, as I like to say, "It ain't over till it's finished" (with a nod to Yogi Berra). Woven fabric isn't ready to use until it's properly washed. Unfinished or unwashed, it will retain some of the tension that it was under during the weaving process and thus won't feel or behave optimally.

Differential shrinkage takes the process one step further, creating a puckered or pleated fabric, using warm water, gentle soap and lots of agitation by hand or machine. With this technique, one block or group of yarns (such as the turquoise 18/2 merino in the photos above) will full and shrink while the other (the 10/2 cotton in gold) doesn't, creating lots of texture and visual interest.

Deflected Double Weave works well for differential shrinkage because of the plentiful floats and open spaces that alternate with blocks of plain weave. By definition, it has two layers that weave in and out of each other (but never on top of each other, hence the term "deflected").

When I posted some photos on Facebook -- after fulling to create differential shrinkage -- one weaver thought the fabric was stitched double weave. I explained that it only appeared that way because the layers of wool fuse together and the cotton relaxes, losing the gaps between blocks and appearing as if it were one layer.

Here's what the back of the fabric looks like before finishing -- that is, in loom state. (My apologies for the fuzzy image, but I was using my iPhone in reverse to photograph the underside of the fabric while it was on the loom.)


And here's what it looks like after finishing. The cotton blocks in plain weave look almost like they are one layer -- while, before finishing, there are vertical gaps in between the blocks (where the wool blocks are weaving on the other side).


Here are sections of the drawdowns (front and back respectively), which give you a better idea of how the blocks of wool (in blue) might fuse together in the finishing process, making the blocks of cotton (in gold) appear as a single layer. (The technical term here is "fulling" rather than "felting," because we are fusing yarn rather than raw fiber.)


I know there's probably some vibration between the colors in the drawdowns, because they are close to being complementaries -- which is what I wanted! I love the energy of combining opposites or near-opposites on the color wheel.

I proceeded to weave up a number of samples before I cut off the fabric and washed it -- so here are a couple of "before washing" and "after washing" photos.


Back of fabric before washing


Back of fabric (now upside down) after washing

My son, who took both photos -- thank you, Jake -- thought that it looked better BEFORE there was any differential shrinkage. I can see his point, where the fabric may look tidier and more elegant before fulling. After fulling, it might appear to some as messy and wrinkled.

But I like it that way! Differential shrinkage just appeals to me. And there's more to come, as I have maybe 3 yards left on the loom, keeping in mind that 3 yards will shrink down some.... I'm hoping to weave a scarf using these two patterns in sequence.


Thanks for reading!


Friday, March 19, 2021

How Many Samples Does It take to Get It Right?


Answer: As many as it takes. 

Which is kind of discouraging but, as they say, the truth hurts ;o)

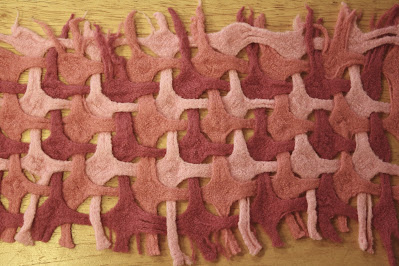
The sample above is the best one, but it's the final one: it took me five other samples to get there! It's a 6-shaft Deflected Double Weave design that I'm working on. I want to weave what I'm calling a "Puzzle Scarf," just because it looks like a lot of fun.

I love the complexity of it and the mystery of how this can be done on 6 shafts. I also love the texture of this piece: It starts out as gauze on the loom, but when you full it with hot water, soap and agitation, it turns into a pretty indestructible piece of cloth.

Here's what it looks like on the loom:


And here's what it looks like before fulling:


The process of fulling for this is fairly detailed, as you have to take the piece out of the water, wring it out and lay it out flat about every half minute in order to make sure that none of the "puzzle parts" stick together. You really want to define the image of three intertwining layers in the cloth. 

So what about all the sampling? Bottom line, it's really necessary for some pieces. I believe that, if you take your work seriously -- that is, if you aim for certain results and you're intent on achieving them -- you have to do what it takes to get there. 

Still, sometimes you have to fight the discouragement that comes with yet another bad sample, yet another re-sleying, yet another re-threading.... I think, as a weaver or a fiber artist, you do understand!

OK, the first sample. I wound a warp of 18/2 superfine merino from JaggerSpun in three colors, as you can see: red, burgundy, and purple. My sett was 24 epi in a 12-dent reed but I had to sley the reed with empty spaces between the colors to get the effect I wanted.

In the case of my first sample, I sleyed 6 ends per color and left 2 empty dents between each color. Which, after fulling, was too dense for my taste, giving the cloth the hand of a jacket fabric rather than that for a scarf.

Too dense

For my second sample, I overcompensated: I again sleyed 6 ends per color but then left 4 empty dents per color in a 12-dent reed. 

Looks like a confusing but colorful fishing net.

The trouble in this case was that my motifs were elongated (if you look carefully at the red warp and weft, for instance, you'll see long rectangles rather than squares). So my beat was off. And the cords that formed after fulling were way too thin, which meant that I had to re-thread from 6 ends per color to 12 ends per color.

Which I did, and came up with this.

OK, so we're looking better, but still the motifs vary in shape.

My next thought was to re-sley so that there were just 3 empty dents between each color. And to try to beat more steadily so that each color formed a square (looking at both warp and weft together).

Better yet, but the cords are still too thin for me.

Back to the heddles, re-threading so that I would have 18 ends per color, still leaving 3 empty dents between each color.

Now we're getting somewhere -- but the cords aren't fully fulled ;o)

Understand that, with each sample, I was learning a lot and I was gaining practice. I realized through this process that -- because this cloth is kind of a messy-looking fabric, with organic shapes and spaces in between the plain-woven blocks -- I had to finesse some of the details. I had to make it as tidy as possible, you might say. To me, this meant fulling the cords till they were solid (which involved sometimes cutting a wayward thread or two after fulling). 

I think the results are worth it. But I have to confess, now I'm at the end of the warp! I have no warp left to weave that scarf I was planning, which adds yet another step to the project: re-winding another warp and re-dressing my loom. I'm not entirely unhappy with this, as I want to try different colors next time.

Thanks for reading!


Sunday, September 15, 2019

What Is the Difference Between Fulling and Felting?

Pictured above: a coat of fabric in silk noil and baby alpaca, 
woven in Deflected Double Weave and fulled for warmth and durability

Before I begin, please understand that the coat pictured above is a work in progress: I haven't finished sewing it!

Anyhow, many years ago I was talking with a felter-friend of mine, telling her how I "felted" a hand-knitted hat I had made. She corrected me, telling me that I had really "fulled" the hat -- not felted it -- because felting involves raw fiber while fulling involves fiber that has been knitted or woven.

Here's how the two terms are defined by Britannica.com. (U.S. readers, remember that Brits spell fiber as "fibre.")

Felting, consolidation of certain fibrous materials by the application of heat, moisture, and mechanical action, causing the interlocking, or matting, of fibres possessing felting properties. Such fibres include wool, fur, and certain hair fibres that mat together under appropriate conditions because of their peculiar structure and high degree of crimp (waviness). Wool can produce felting even when mixed with other fibres. 

Fulling, Process that increases the thickness and compactness of woven or knitted wool by subjecting it to moisture, heat, friction, and pressure until shrinkage of 10–25% is achieved. Shrinkage occurs in both the warp and weft see weaving), producing a smooth, tightly finished fabric that is light, warm, and relatively weather proof. A common example is loden cloth, first produced in Austria in the 16th century.

There are a lot of mysteries and opinions (oh my, the opinions!) involving these two processes. Which soap to use? How hot should the water be? Machine wash or hand wash? Do you "shock" the wool by immersing it in cold water after using hot water? Can you heat the fiber in a microwave? And so on. 

I won't be addressing all of these questions; I'm talking about my own hand-woven fabric and how I went about fulling it. Here's the "before fulling" state.


And here's what it looks like after fulling.


And here's another view.


The colors in the photos vary because I used two different painted warps to weave the fabric in Deflected Double Weave. I dyed the silk noil in a range from teal to purple to turquoise and I dyed the baby alpaca warp in a range from lavender to periwinkle to mauve.

You might be thinking: I like the piece before it was fulled. And there's an argument for that, certainly. The main reason I fulled it was for texture: This was to be sewn into a coat and I needed a sturdy, warm fabric for that. I also just love the look of fulled handwoven or hand-knitted fiber: it acquires an organic, more natural look, less angular and tidy -- and to my eye, far more interesting!

Here's a photo of the back of the coat to give you a better idea of what I am going for.


The fulled fabric has a bit more eccentricity and quirkiness, in my view.

I've long pondered the question, "What makes wool felt?" The simple answer lies in the microscopic structure of the fiber. It has tiny scales on it that open with heat and soap and agitation (and pH, when you get really scientific about it) and then lock into each other as the agitation continues.

Here's a photo I found on Pinterest that gives you a microscopic view of a number of fibers. Unfortunately, I can't find where it's from because it's all over Pinterest, with no attribution.


See the scales on the coarse wool and fine wool (first and second fibers on the left)? And see the smaller less defined scales on the alpaca (third from left)? 

Many people will tell you that alpaca can't be felted or fulled -- but that's not really true. It's just that it takes longer to do so.

And I can testify to that. Without going into all the gory details, it took me several days of washing and sloshing my 8 yards of fabric in the bathtub, in the sink, and even in the washing machine. There's even some nudity involved but I won't go into that on a family blog ;o)

I just wasn't getting the results I wanted -- and then I remembered a spinner telling me that she used Murphy's Oil Soap to felt her wool. Murphy's is slightly basic, at a pH of about 11, and that change in pH helps the scales to open which in turn promotes their locking together.

So I tried Murphy's and yes, I did get the results I was after. Not perfect, but close enough. 

And I learned a lot in the process -- which is half the reason we fiber folk enjoy what we do! Thanks for reading.