Showing posts with label deflected double weave. Show all posts

Wednesday, August 27, 2025

Name Drafts Aren't Just for Overshot....


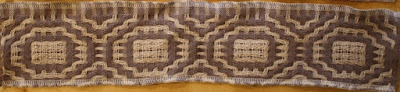
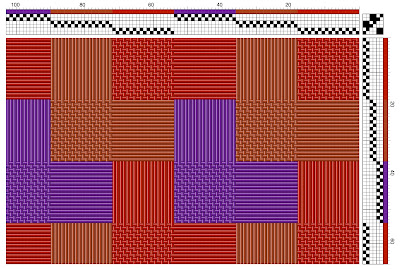
Above is a name draft using -- why not? -- the name Michelangelo, employing an Echo threading and a twill tieup and treading. A name draft is a fun and fairly easy way to design a weaving pattern, working with the name of a friend or loved one or, in the case of Michelangelo, an icon, as a sort of coded message in your weaving. You can achieve this either by hand using graph paper or using weaving software.

(A bit of self-promotion here: I will be teaching a one-day workshop on this subject, called "Name Drafts, 8 Shafts, and Parallel Threadings," at Convergence 2026 at the Sheraton New Orleans in New Orleans, LA, next August 12-16. Registration will begin soon, but the schedule hasn't come out yet, so keep checking back on the link above for updated information. The subject of this post is NOT how to create name drafts with Echo threadings because I wouldn't want to give away the gist of the workshop. However, if you keep reading, I will walk you step-by-step in creating a name draft using deflected-double-weave techniques.)

As for name drafting itself, let's define our terms. We'll start with an impeccable source, Madelyn van der Hoogt, who wrote in Handwoven magazine on January 22, 2018, "A name draft is an arbitrary way to create a threading draft (usually threading, though it can be used for blocks or for treadling orders, too). There are many ways to do name drafting, but one is to assign a letter to each shaft: A = 1, B = 2, C = 3, D = 4, E = 1, F = 2, etc., for four shafts, for example. Then you just thread the number corresponding to the letters from words or phrases. Naturally, this doesn't necessarily give you a threading that can be used, so then you adjust. Most often name drafting is used for overshot."

But not just for overshot, as you can see from my Echo example above. As Marg Coe points out in the introduction to her online course, "What's in a NameDraft?", "Traveling outside name-drafting with traditional overshot we will design shadow weave, deflected double weave, double weave, rep, Corris effects...." All these designs are possible using name-draft techniques.

Sneak preview: In the upcoming issue of Handwoven magazine, I have used a name draft to create a deflected-double-weave design based on the name of my beloved grandfather, George Relyea. (I won't give away any more of the story, which is the "Yarn Lab" project in the next issue -- and it brings some exciting news! 'Nuf said.)

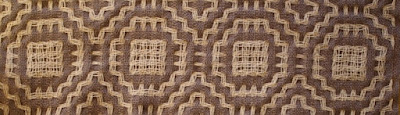
Here's how George Relyea weaves up in deflected double weave on 8 shafts. I really like the design!


So how do you do this? I work with Fiberworks (the Mac version, which varies slightly from the PC version, but these instructions should get you there on either system).

Step 1) Pick a name. (Please note that some names do work better than others, so, as Madelyn writes, you have to make adjustments.)

Step 2) In the "Tools" drop-down menu, (found at the top right side of the drawdown page as you begin), click on "Namedraft" and then type the name in the box provided. No spaces, no initial caps. The name-draft window gives you all sorts of choices, but for the purposes of this tutorial, just leave it as is. (You can experiment to your heart's content after you've learned the basics.)

Step 3) Click on "Accept" (making sure you have one color in the warp and another in the weft), and there you have it! An overshot-looking design (more like turned overshot, but anyway) that's built on the name you chose. 

Here's what the beginning of my name draft looks like on my computer screen.


Step 4) On the "Tools" menu, click on "Block Substitution." Then click on "Classic Weaves," and  "Overshot, Multishaft." Then click "Accept." My draft now looks like this.


Step 5) Using the shaft-shuffling tool at the top of the Fiberworks window (the one that has a single arrow pointing both up and down with a horizontal line going through it), use the cursor to change shaft 3 to become 5 and shaft 4 (which is now on shaft 3) to become shaft 6. This means that your threading blocks always alternate between shafts 1 or 2 and shafts 3 or 4. This is based on the Stubenitsky method of drafting deflected double weave.

Step 6) On the "Tieup" dropdown menu, click on "Shafts and Treadles," change the number of treadles to 8, and then click "Set."

Step 7) Again on the "Treadling" drop-down menu, click on "Weave as drawn in," making sure that you unclick the box for "colors." Then click "Copy Exactly as Drawn." 

Step 8) At this point, your draft will look like a mess, but that's because you need to change the tieup to a deflected-double-weave tieup. These tieups are always boxes of 2 shafts and 2 treadles that are either 1) all black, meaning two adjacent shafts will be lifted together twice in the treadling, 2) all white, meaning that two adjacent shafts will stay down together twice in the treadling, or 3) weaving plain weave.

My tieup looks like this: (Note: To repeat, I'm following the Stubenitsky method in the tieup, in which -- for an 8-shaft draft -- the four shafts and treadles on the bottom left and the four shafts and treadles on the top right are tied up to weave plain weave, while the four shafts and treadles on the top left and the four shafts and treadles on the bottom right weave the pattern, comprising four-unit squares of two shafts and two treadles which are either all black to lift the warp or all white to lower the warp. The plain-weave portions of the tieup are always stationary, while the blocks of 4 black or 4 white can be moved about to alter the pattern.) Here's what my tieup looks like.


Step 9) To see your design as deflected double weave, you need to change the warp colors so that every other block of four warp ends is one color and the adjacent blocks are another color.  And you need once again to click on the "Treadling" dropdown menu, click on "Weave as drawn in," and click on "Copy Exactly as Drawn" so that the colors in your weft alternate block by block as well.

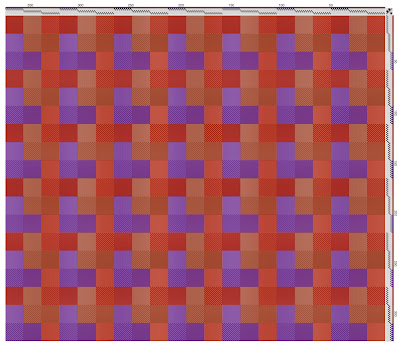
And this is what you get with my name draft.


Not bad for an hour's work, don't you think? And this technique allows you to encode something special, unique, and meaningful to you. Again, if you're interested in learning the full spectrum of possibilities for name drafting, I urge you to check out Marg Coe's free, live course (click here).

Thanks for reading!


My "George Relyea" name draft again, this time with a different tieup.


Wednesday, October 19, 2022

Coming December 1: My Book on Texture in Weaving


You're looking at the cover of my soon-to-be-published book on texture in weaving! I've been working on it for, lo, these past five years and it's almost ready for publication.
I plan to begin offering it on Lulu on December 1. And after that, I might celebrate with a good brew or two ;o)

Why did it take so long? Mainly because it includes 12 projects for 4, 8, 6, and 16 shafts, which meant I had to weave them all and document every single detail. And check and double check -- 80 versions and revisions to date, which isn't all that surprising. Plus, with some of the projects, there was much sampling involved, meaning lots of warps and dressing of looms until I got it right.

The title, "Weaving Outside the Box," has two meanings: first, I'm referring to creativity in design and process, "thinking out of the box" about what and how we weave. Second, I'm referring to the rectilinear, two-dimensional plane of weaving -- "the box" that we are typically confined to in our craft -- and how we can begin to break those boundaries. Textural weaving is all about ripples and pleats and buckles and poufs, about bends in the road and reflections on the organic curves of nature herself. Take, for instance, this image of lateral curves of fungi on a tree trunk:

I see a reflection of these lines in a double-weave sample I wove on four shafts, in the style of Liz Williamson:


Different colors, of course, and less nuanced, but the two images share flowing horizontal lines, staggered randomly. I love the unpredictability of how the patterns shift and bend -- much of which takes place in the finishing. After washing these fabrics, the results are  always surprising, which makes it so rewarding to me.

The book is about 120 pages long, with 90 full-color photos and diagrams that aid in understanding the hows and whys of dimensional weaving. It includes a long bibliography to aid in further study, an index (to me that's a big deal, for some reason), and three beginning chapters on the theory of texture in weaving, its history, and some of the overriding techniques involved.

Here is a peek at some of the projects in the book.

Antelope Canyon Shawl in point twill on 4 shafts, 
16/2 bamboo gradient warp, silk/stainless-steel weft

Detail of 'Puzzle Shawl' in deflected double weave 
on 6 shafts, 18/2 merino in warp and weft

60/2 silk striped scarf in plain weave and turned twill 
on 8 shafts, with soft pleats in the middle

Deflected-double-weave infinity scarf on 16 shafts,
using hand-painted warps and wefts in 18/2 merino and 10/2 cotton

Right now, the final draft of the book is with a group of first readers, in alphabetical order, Marianne Antczak, Leslie Mendelson, Ann Richards, Joyce Robards, Sarah Saulson, and Linda Schultz. All of them are wonderful weavers who have generously agreed to serve as fact-checkers and goalies, you might say, to keep any errors from appearing in print. It's good to have smart friends!

As I mentioned, I will offer the book on Lulu, a print-on-demand site used by several folks I know. I will also offer an e-version at a slightly lower cost (and no shipping charges, of course). 

If you're interested in pre-ordering, please click on the "Downloads for Purchase" section of this site, where you'll find a link. I will be in touch as soon as it ships on December 1.

Let me know if you have any questions, of course. My email address is in the "Contact Information" page on this blog. 

Thanks for reading!

Front and back covers, ready for printing


Thursday, February 10, 2022

Collapse Techniques: Some Active Yarns and How They Work


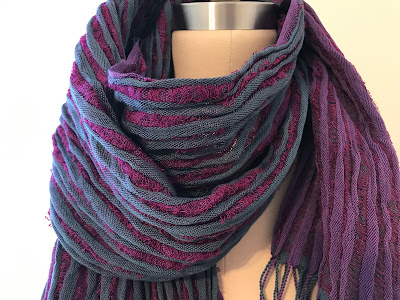
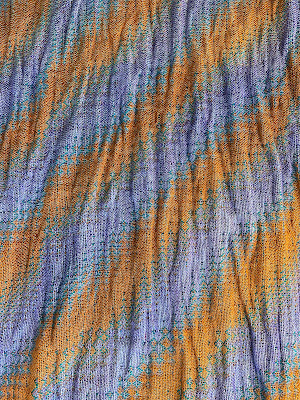
Pictured above: A scarf woven on 4 shafts in deflected double weave. The warp is 20/2 cotton in stripes of teal and purple and the weft uses these yarns plus a wool/stainless-steel yarn (see the floats above, in fuchsia). The scarf looks like gauze on the loom, but when you wash it in gentle soap and lukewarm water, the wool/stainless floats crinkle up and draw in horizontally, creating vertical pleats in the fabric.

I love these surprises in the finishing! And one of the easiest ways to achieve them is by using active or energized or exotic yarns -- a large category that includes yarns that will shrink, twist, collapse, and/or relax after washing.

Right now I'm teaching a Zoom workshop for the Reno Fiber Guild, "Deflected Double Weave for Collapse Fabrics." I put together a short handout on the active yarns we're using and how they work and I thought it was worth sharing in a blog post. Here's the list -- of course, it's not comprehensive -- along with photos and images of the yarns under magnification.

Fine Gold Gimp (Metallic Yarn)


The thicker version of this yarn doesn't work well for creating texture in fabrics, but the finer version can add a lot of interest. It's really 77% polypropylene and 23% metallic. And it's hard to find: The only vendor in the States that sells it is Made in America Yarns, a Philadelphia company that lists it under the name "fine metallic gimp yarn."

This is what a single strand looks like at 60X magnification.

And here's what it looks like after weaving and washing.


The polypropylene shrinks up with warm water and soap, bending and crimping the metallic coils around it. When used as weft, this can create some interesting motifs as it shrinks the fabric width-wise.


Wool/Stainless-Steel Yarn


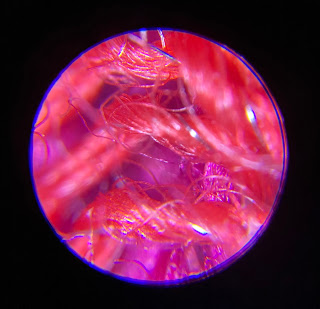
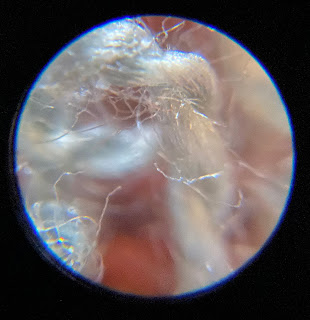
This yarn, available from Habu Textiles, is what I used as weft in the scarf pictured at the beginning of my post. You can achieve similar effects with silk/stainless-steel yarn, available from Lunatic Fringe. Here's what it looks like under 60X magnification, unwoven (first photo) and woven and washed (second photo).


The wool shrinks in the washing and the stainless-steel filament bends with it, so that the sample is drawn in. I find that you can actually shape the garment, either flattening it out or stretching it vertically to create vertical pleats. It all depends on your mood ;o)


Deflected double weave sample on 8 shafts


Deflected double weave sample on 12 shafts

18/2 Merino Wool

Nothing beats wool for differential-shrinkage effects. Combine it with cotton or silk or some other inactive yarn and you'll get pleats and poufs and lots of texture. (Note: I don't recommend using JaggerSpun Zephyr, because the silk component doesn't full in comparison with the 18/2 superfine merino. Also, be careful not to purchase super-wash wool yarn, because these yarns are chemically treated NOT to full or shrink.)

Hand-painted warp of 18/2 JaggerSpun superfine merino


1 strand of 2-ply yarn, before fulling


Magnified image of the yarn after weaving and fulling


16-shaft deflected double weave sample after fulling, using 18/2 merino and 10/2 cotton in both warp and weft (hand-painted warps and wefts)

Venne Colcolastic (and Other Elasticized Yarns)


This yarn has two components: a fine 2-ply mercerized cotton and an elasticized single. Here's what it looks like under magnification:


And here's what it looks like under magnification and after weaving and washing:


My explanation for this effect is that the elastic draws in and the cotton is drawn in with it, crinkling and twisting up as it goes. Below is a sample of a 4-shaft deflected-double-weave piece I wove with long weft floats of the Colcolastic. (You're viewing the warp horizontally.)


This second sample, below, has no floats on the front and narrow floats on the back, simply because there are just 4 warp yarns in the block it floats over. It's a 12-shaft deflected double weave. Colcolastic is used as weft for the middle section only.


Active yarns are just one way to create textured fabrics. You can also achieve dimensional effects just by weaving structures that lend themselves to texture: turned twills, honeycomb, waffle weave, and of course deflected double weave will create curves and pleats even without the aid of active yarns.

Weavers will sometimes get preoccupied with color and structure, forgetting about that third invaluable characteristic of our craft, that of texture. In her definitive book, On Weaving, Anni Albers devotes a chapter to "Tactile Sensibility," focusing on the importance of matière:

"Matière is the word now usually understood to mean the surface appearance of material, such as grain, roughness or smoothness, dullness or gloss, etc., qualities of appearance that can be observed by touch.... Surface quality of material -- that is, matière -- being mainly a quality of appearance, is an aesthetic quality and therefore a medium of the artist...."

Weaving, in her view, brings us back to our ancient tactile sense. Of course, the yarns we use are central to this achievement.

Thanks for reading!


Monday, January 17, 2022

Through the Weaving Glass: Some Thoughts on Counting Picks...


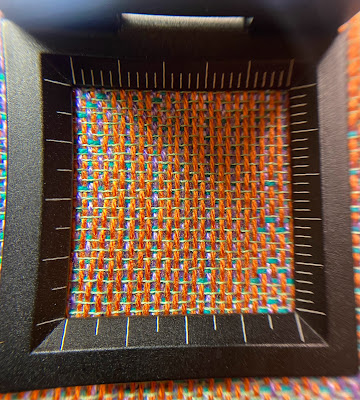
The photo above shows a "pick-glass," outlining a square inch of cloth. I took the photo with my iPhone, shooting through the lens of the pick glass, and the image is surprisingly clear.

(OK, I have to confess here that I always thought it was spelled "pic" -- until I looked up "pick-glass" on Google. Yes, it's true. Now I know.)

If you're thinking this is a useful device and you want one, you can find them on Amazon, of course, by searching for "counting glass" or "thread counting glass" or "pick counting glass." I'm sure they're used all the time in the textile industry. For weavers, it's a very handy device. 

In the photo above, I have woven what looks like a 24 picks per inch on a warp sett at 24 warp ends per inch -- which would be a balanced weave, except that I'm using different weights of yarn in the warp and the weft. (The orange warp ends are 16/2 bamboo and the pale green weft yarns are silk/stainless steel at an unknown grist, something like 20,000 yards per pound.)

Also, this is double weave, so there are another 24 warp ends and 24 weft picks on the back side of the cloth. You can see some of the warp and weft peering out in lilac and turquoise, respectively. So we're really talking about 48 epi and 48 ppi total. I decided to use my pick glass to reassure myself that I wasn't beating the gossamer-fine weft too hard.

Because weavers are persnickety, right? And rightfully so, as we want our cloth to have a good hand and our weave structures to look just so, whether it's plain weave or satin or twill or whatever. For that reason, weaving patterns will often specify ends per inch and picks per inch along with the type of yarns to be used.

If we're not paying attention, we wind up with this:

Deflected double weave with squashed motifs, woven by me when I wasn't thinking

Instead of this:

Deflected double weave with balanced motifs, after I started beating gentler

Here is another sample, a well-balanced 12-shaft shadow-weave design of mine, woven by Maryann Ariizumi:


Shadow weave should be sett and beat as a balanced weave, because the structure is essentially plain weave, with floats of 2 ends or picks here and there. Warp and weft yarns are identical, typically.

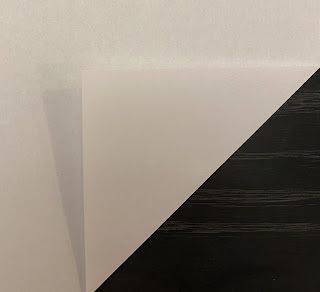
One way to achieve this kind of balance in your weaving is to simply eyeball the pattern. Twills, for instance, should rise at a 45-degree angle. Another way is to take a piece of paper and fold it in at the corner, like this: 


If you fold it carefully, so that the top of the fold falls along the horizontal and the side of the fold falls along the vertical, you'll get a 45-degree angle, which you can just place on top of your fabric to compare it with what you've woven. Works great!

But other times, when you're weaving with a fine warp and/or weft and you're aiming for a specific number of picks per inch, you will definitely want to count threads. 


A pick glass also helps in analyzing structures and trying to check out errors or the direction of yarn twist (S or Z). It's very comforting to know for certain what's going on.

In fact, I carry mine in my purse, along with a 6" ruler. How's THAT for the definition of a weaving nerd?

Same fabric as in the first photo, through the camera lens

Thanks for reading!


Thursday, December 16, 2021

Three-Layer Puzzle Scarf: Less Complex Than It Looks!


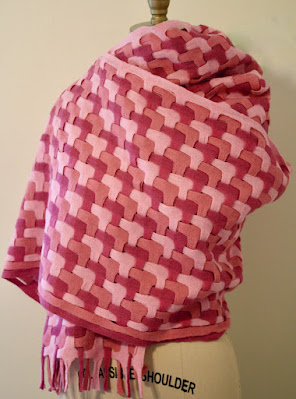
I have been working on this piece for lo, these many years, ever since I saw a photo on Pinterest with a draft that I still can't figure out. Perhaps it involves actually cutting out some of the warp blocks -- I'm talking scissors here -- to achieve the difference between the upper and lower sections of the fabric.


I know how to design the top portion of the fabric and I know how to design the bottom portion of the fabric. But how do you weave a design that incorporates both? If you look closely, you will see at the top of the photo that some of the warp blocks just disappear. I love the ingenuity of this, but I'm not prepared to weave the many, many samples required to get it right.

Around the same time, I came upon a couple of photos of work by the late, great Sandra Rude. 


Above scarves woven by Sandra Rude

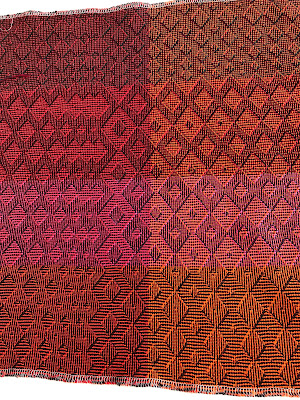
I spent a long time working out the threading, tieup, and treadling for the second piece and, long story short, here is what I came up with. It calls for 20 shafts.


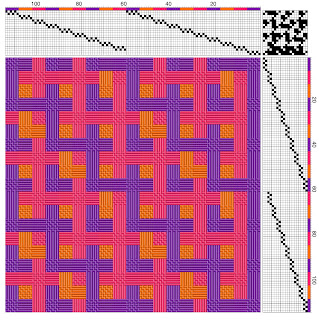
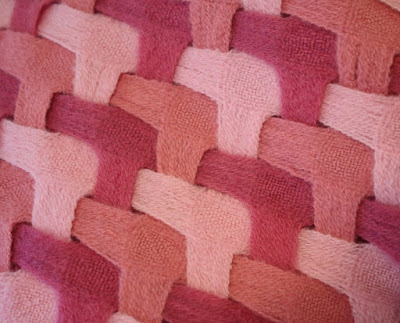
Although I have a loom with 32 shafts, I didn't want to replicate Rude's lovely design -- rather, I wanted to create one of my own, hopefully as interesting, but with a clearer pattern. So here is my version of a deflected-double-weave puzzle, calling for just 6 shafts:


Here's what the full drawdown looks like:


It looks quite simple to weave, right? 

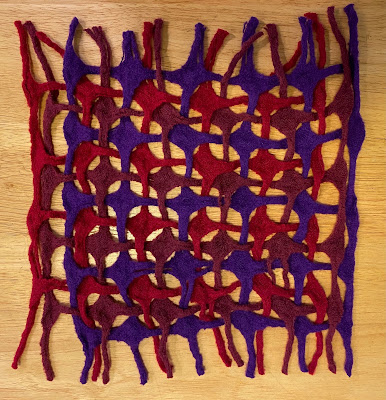
Absolutely not, especially if you want to full the fabric, as I did (to reduce problems with the long floats and make the layers more distinct). I won't give you the long list of my missteps, but here's just one of the samples that didn't work.


Note that there are two warp blocks on each selvage that appear to be spaced farther away from the other blocks. Actually, the sett is the same throughout: 18 epi for 18/2 merino. The problem lies with the process of fulling itself, which stretches the outer layers away from the others. 

Details: The warp blocks were 18 ends each. The sett was 2 ends per dent in a 12-dent reed for 9 dents and then leave 3 dents empty and repeat. I had to weave the weft blocks in a similar fashion, which called for a very careful, gentle beat.

In my view, the above sample looks like some kind of netting. So I put on another, longer warp and decided that I would first create more samples and then weave a long scarf once I got it right. For this next set of samples, I spaced the two warp blocks on either selvage just one dent apart, leaving the remainder of the blocks 3 dents apart as I did with the first sample. 

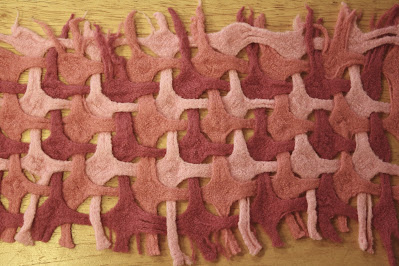
Here's how that looked (you can't really see the blocks at the selvages -- but they're better, trust me):


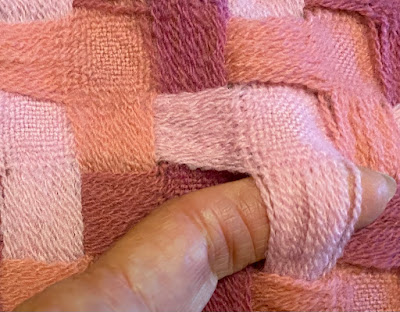
Better, yes, but still not what I was going for. I wanted a softer, flatter appearance, somewhere between the gauzy fabric you'd get if you didn't full it at all and the rope-like, corded fabric you see above. Finally it dawned on me: I needed to talk to a felter! Felters know a lot about what you might call the Goldlilocks Effect, making sure their fabric is not too stiff yet not too gauzy.

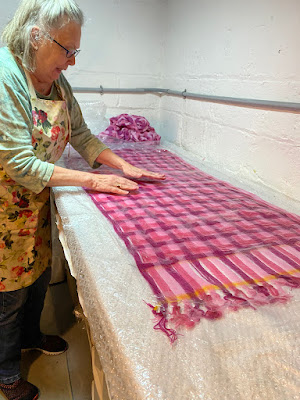
And this is what fiber friends are for. So I called up Marie Brate, a talented felter in our guild, and asked her to give me some pointers. Marie brought over some bubble wrap and showed me how to keep the fabric flat and add just enough soapy water to encourage fulling.


Marie Brate to the rescue!

Sometimes I feel like it takes me a long time to figure things out -- to realize that this shawl called for skillful weaving AND skillful fulling. Prior to having this seemingly obvious insight, I would simply agitate a piece like this in the washing machine or by hand. I've learned that this creates a much denser look. There is a place for that, but not for a scarf that I want to wear.

Turns out the finishing was harder than the weaving itself. It took hours, mainly because I wanted the details to be just right, which included separating every layer at every juncture by hand.


I went through this entire process once and saw that the fabric truly needed more fulling. So I washed and fulled it again -- and then I had to separate each and every layer again, by hand.

It was worth it, however, because I'm happy with the results. 


Thanks for reading!