Showing posts with label network drafting. Show all posts

Monday, October 21, 2024

A Visit with Eva Stossel


Above: My favorite piece among all the weaving I've seen by Eva Stossel, in networked double weave on 16 shafts, with warp and weft in 20/2 cotton. I really like the tesselation effect.

Which brings me to the point of this blog post: Eva Stossel (you can visit her blog at www.evasweaving.wordpress.com) is, in my humble opinion, one of the best weavers around the country these days. 

Take a look:

Another 16-shaft network-drafted double weave, again using tesselations. Even more interesting: If you walk far enough away from the photo on your screen, you'll see an overall pattern in this piece, sort of a vertical-ellipse shape, made by the squares themselves!

Here's a detail:

How did she DO that? I figure it's two colors in the warp and weft of the top layer (white and red) and two colors in the warp and weft of the bottom layer (purple and red), and her design is networked but not paralleled. And then she shifted equal-sized rectangles in both threading and treadling throughout the piece to achieve the tile-like effect.

And how about this?

Tied Lampas in 4 blocks, in a clean, refreshing design (and, by the way, using complementary colors of green and red and purple and yellow, which add to the aesthetic appeal).

And yet another:

Woven moiré in pearl cotton on 16 shafts

Eva is really generous in sharing her drafts -- both in her blog and as WIFs when asked (although at times, rightfully, she does keep some designs to herself). Her writing is clear and concise, making her blog a gift to the weaving community at large. 

I had no idea where she lived until I happened to mention how I admired her work to my friend Hedy Lyles, herself an excellent weaver from Willow Grove, PA. Both Hedy and Eva belong to the Philadelphia Guild of Handweavers.

One of Hedy's twill scarves, on display at Convergence 2024 in Wichita in July.

Come to find out, Eva and Hedy are friends! Over a weekend when I was visiting family in Philadelphia, Hedy and I took a road trip about an hour out of town to visit Eva. It was a pleasure to finally meet her. She seemed surprised when I told her her blog has fans nationwide!

Hedy, left, and Eva, right, talk weaving. Note one of Eva's designs at the bottom of the photo, woven to create an Ikat look.

I remember Hedy telling me that she weaves on a 16-shaft Macomber loom, which surprised me, as I expected her to rely on the convenience of a compu-dobby. It takes a lot of strength (and a lot of tromping) to weave on 18 treadles to lift the cast-iron shafts of a Macomber!

Eva's Macomber, with an end-feed-delivery shuttle poised on the shuttle race.

She samples religiously and keeps detailed records, which is exactly what all the great weavers do, in my view.

Eva told us that often she will use her 4-shaft Structo for sampling -- clearly not to see how a 16-shaft pattern works, but just to see how the warp and weft yarns weave together. I consider that a noble endeavor, one that never even occurred to me ;o)

Eva with her files

More samples, more notes

Really, I wanted to meet Eva because I so admire her work and her generosity -- and I wanted to learn something about how a master weaver works. Of course, you can't access a person's mind and discover the source of their creativity (don't I wish). What I did learn: Start with a good idea, sample it, sample more, make sure the yarns and colors work, dig deeper, keep weaving, keep learning. That's the essence of what it takes.

And, as is so often the case, I found how much I enjoy making friends with fellow weavers. Thank you, Hedy and Eva, for a delightful afternoon!

Not the most flattering photo of any of us (from left: me, Eva, and Hedy) but it documents a meeting of hearts and hands, you might say....

Thanks for reading!


Tuesday, November 19, 2019

No Weaving Software, Just Pencil and Paper: A Primer on Network Drafting


This post is for folks who wonder what network drafting means -- people who hear the term and have only a vague idea of curves and circles -- and want to know more.

(For those who understand the concept and want to dig further, I suggest you buy a copy of Network Drafting: An Introduction, the definitive work on the subject written by Alice Schlein and available by clicking here on Amazon. Schlein is the brilliant weaver and designer who introduced network drafting to the weaving community back in the 1990s through a series of articles in Weaver's magazine.)

Fundamentally, computers and weaving software have brought the world of network drafting to the weaving community at large. Still, the best way to learn how it works, according to Schlein, is to begin with a pencil and graph paper. This way you will understand the basics of network drafting -- instead of not knowing what happens when you tell your computer software to "Redraw on network" after you've created a design line. Also, the pencil and paper method gives you a lot more control if you want to create your own designs.

Moving on: For this blog post, I created a downloadable design grid based on an initial of 4, which is the most commonly used initial.

Here's what it looks like.

If you look closely, you'll notice that there are three empty squares between every gray square, both horizontally and vertically. That means this network is based an initial of 4.

The "initial" can be defined as the foundation or scaffold for your threading -- the only places where you are able to thread your draft, so it really serves as an underlying method for your design. An initial of 4 means that every possible threading on your network is always on the gray squares above, each of which is 4 squares away from the next one, both horizontally and vertically. In essence you have a twill-based threading plan.

(You'll notice that the grid looks something like a twill fabric. I think of it as the twill lines you see on your blue jeans: one warp end up, three weft ends across -- that's how it weaves. Cut the fabric up in a wavy, curving ribbon and thread only the warp pattern on that ribbon and you have the idea of a networked threading.)

Please remember, this tutorial is really just a first step -- a baby step at that. There are so many options and variations, but let's assume you're working with 8 shafts. (Schlein offers many options with 8 shafts alone, but again, this is just a basic tutorial.)

So take your pencil, turn your grid horizontally, and draw a horizontal line across the page. Now draw a second line, this one 8 squares on the grid above the first.


Now draw a curving line across the 8-square-high space you've created on the grid. The line should travel the grid from top to bottom continuously, as with the break you see, which ends at the top and continues at the bottom, as if it were wrapped around the space we're working in. (This is much like an advancing twill line on 8 shafts, which can only go as far as shaft 8, so the next thread can't go on shaft 9 and therefore begins again on shaft 1.)


Now create a second line that is 4 squares above the blue line on your grid. When you can't go above any further, return to square 1 and begin there.


This defines your threading ribbon, which uses an initial of 4 squares for its height. (Remember the ribbon we've cut from our jeans, as mentioned above?) Remember that whenever you reach the top of the black horizontal line, you need to circle around to the first square again. 

Now you want to fill in your ribbon, like so.


At this point I will admit, I'm not much of a graphic artist. But I'm hoping you get the idea.

Finally we create our networked threading, by marking every gray-shaded square that falls within our ribbon. Here's what our example looks like.


Here's what the threading looks like when entered into weaving software. (Keep in mind that I've tweaked our practice ribbon a bit here and there. It's just for the sake of demonstration.)


And here's what our threading looks like when woven as Jin on a 5-thread advancing-point twill.


Not a home run, perhaps, but a good beginning. Remember that networked designs -- as with most weaving designs -- take a good bit of trial and error, lots of playing with the computer, and lots of sampling, before we achieve loom-worthy results.

Thanks for reading!


Sunday, July 21, 2019

How to Find Your Place in a Complicated Treadling (Or: Sometimes You Just Have to Unweave)

I recently had an email discussion with a friend who took one of my workshops -- who, after arriving home and returning to her sample, could not remember where she left off. She sent me an email, including a close-up of her sample, asking if I could help her find where she was in the treadling.

Has this happened to you? If not, you are fortunate and you may have a genius-level IQ. If it has happened to you, you may agree that weaving can be a lot like the little girl in the nursery rhyme: 

There was a little girl,
Who had a little curl,
Right in the middle of her forehead.
When she was good,
She was very good indeed,
But when she was bad she was horrid.

Longfellow wrote that, by the way. Who knew?

Here is our exchange, below, beginning with a photo of my friend's sample. She was working on a network-drafted 8-shaft pattern, the kind of pattern that can make it very hard to figure out where you are in the treadling (or the threading, even more so). 


And here's a portion of the drawdown, giving you an idea of why it's hard to locate the exact place she left off.


So here's what I wrote to her:
_______________________________________________________

Dear Debbie,

Unfortunately the only way you can really figure out where you are is to follow these steps. Trigger warning: These steps include unweaving ;o)

1) You have figured out approximately where you are, so have your treadling in front of you with the area you think you are (or areas, often) marked clearly.

2) Begin unweaving, marking down which treadle you're using for each pick.

3) Once you start to see a pattern (which is backwards, of course, but you know that), double check it against your treadling sequence (in step #1, where you've marked where you think you are).

4) Once you're pretty darn sure you've found it, start weaving forward. It will soon become clear whether or not you're correct! 

5) If you find you're incorrect, sigh deeply and/or curse, go back to step 1 and begin again.
_______________________________________________________

Have you ever unwoven anything? Are you philosophically opposed to doing so? As for me: I do it all the time!


Sunday, February 12, 2017

More from the Warp That Keeps on Giving: Turned Taqueté


At this point, the problem is making a decision -- ANY decision, for crying out loud! I have been able to weave so many patterns on this warp -- an extended parallel threading -- that it's hard to choose which one I like the best.

So far, I have woven maybe maybe 10 different patterns, using two different tie-ups and lots of different treadlings. I've finally decided on the two in the photo above. (Not one, but two -- but that's OK, because I like the way they work together.)

Both patterns are treadled as Turned Taqueté, which I've blogged about extensively because it's such a beautiful structure. The diamond-shaped pattern is created with a simple advancing point twill treadling. Here's how it looks close up:


And here's the drawdown:
For the other pattern, I created a networked treadling based on an initial of 2. Here's the drawdown for that.


So now I have about 8 yards left to weave, which is hopefully enough to make a garment. Lots of keeping track of complicated treadlings -- once again, an argument for purchasing a computerized loom....

And here's one more image, this one of Echo Weave woven on the same warp using a point-twill treadling. My thinking is that this pattern looks good close up, but from a distance of a yard away or more -- which is the kind of distance I like for viewing a garment -- it doesn't show up as well.


Thanks for reading! More to come as I begin creating collapse-weave samples on my table loom, in preparation for workshops I'm teaching in the summer.

Monday, March 23, 2015

12 Harness Turned Taqueté: From Dismal Failure to Success (with a Few Treadling Errors)


First, the success: Finally, after what seemed like hours on the floor fiddling with treadles, I'm able to weave the draft I envisioned in my head (and on Fiberworks): a 12-harness turned taquete adapted from a profile draft for 8 harnesses published by Bonnie Inouye in the Complex Weavers Journal. I fell in love with the circles and curves and have been working on it through several iterations.

Now, the dismal failure.


Right. Not the same draft, but that's not the reason it doesn't look like turned taqueté. The treadling was all wrong (that accounts for the hours under the loom) AND I forgot to check for floats. The pattern is all floats. Although I do acknowledge that it might be interesting if you wove it as an eyelash fabric (cutting the floats so that they became like "eyelashes" on top of the fabric).

Now, for those of you who are better math-heads than I am, this all might seem terribly obvious. For me, I didn't get it until I wove it. And then I got it pretty quickly, as you can see, because I wove about an inch before I cut it off. Stewed about it for quite a while and wondered what the heck was wrong.

Went back to the drawing board -- Fiberworks, that is -- and succeeded in creating a network draft with parallel threading for 12 harnesses based on the profile draft mentioned above. I used two different painted warps of 20/2 silk and combined them, threading them A-B-A-B for the parallel threading. The weft is 60/2 silk in purple from Webs. Snatching success from the jaws of failure!


This is only a sample, aiming for a fabric I would like to weave for a jacket.  Right now, I'm playing with treadlings. And getting the threading right, of course. A careful observer might notice three threading errors in this piece -- but I won't tell you where they are ;o) Suffice it to say that I broke down and bought some repair heddles, because I'm tired of making them out of string. I find that turned taqueté is a challenge to thread, particularly with parallel threading, because it has no regular blocks. It's all over the place and, if your attention lapses for only a second or two, you have to deal with it when you're weaving.

Here's one more view of the sample, with a different treadling and an off-white weft. I think it looks washed out, but it always pays to experiment. You never know!


A post-script: tying up 14 treadles for 12 harnesses is enough to convince me I need to purchase a computer dobby loom....


Tuesday, July 29, 2014

'What Is Turned Taqueté? A Weave by Any Other Name...'


I have been trying, with modest success, to understand the weave structure known as Turned Taqueté. 


Turned Taqueté is described alternately as polychrome Summer and Winter but without tabby... or warp-faced compound plain weave... or like Samitum but based on plain weave, not twill.... Quite honestly, I do not have enough weaving background -- or I am not enough of a math-head -- to fully understand all the analyses and terminology. I do know that there is a tie-down weft and that the pattern warps float over three wefts and then are tied down as well. Ideally, the weft is much finer than the warp, allowing the warp pattern to show. And for what I want to do -- that is, paint two different warps and then weave them together in one fabric, so that the colors play against each other and with the pattern -- Turned Taqueté is terrific. Alliteration intended. 

Simply put, this structure provides for a wonderful drape and beautiful design possibilities. I wove the sample above (and below) on 8 harnesses using two hand-painted warps in 20/2 silk and a weft of black 60/2 silk.  


The incomparable Bonnie Inouye designed the pattern and I modified the treadling a bit. Below is a small version of the drawdown. (If you would like me to share with you the WIF file, send me an email at dkovn@hotmail.com.) The pattern appears in the most recent issue of the Complex Weavers Journal, in an article by Inouye, "Turned Taqueté, An Introduction." In the article, she also discusses how to draw this structure on a network, using either Fiberworks or WeavePoint software. Network drafting is another wonderfully intricate subject -- one that is discussed and illustrated at length in Marian Stubenitsky's new book, Weaving with Echo and Iris. Network drafting allows weavers to soften and curve their patterns, so that the structure appears fluid rather than rectilinear.

I think I have just dipped my toe in the water....


Monday, July 21, 2014

An Entirely Arbitrary Look at Convergence 2014

From a very biased viewpoint: Mine! A group of Rochester Guild members -- including two "Convirgins," as weavers affectionately call those who are attending the convention for the first time -- journeyed to Providence on Wednesday, July 16, to see the fashion show and the exhibits. And, of course, the vendors.

For those who aren't familiar with what Convergence is: this is the biennial convention of the Handweavers Guild of America, held somewhere in the continental United States and drawing a couple of thousand weavers, teachers, exhibitors, and vendors from all over the world. It is an inspiring event and -- because it's usually held on the West Coast -- I was not about to miss it.

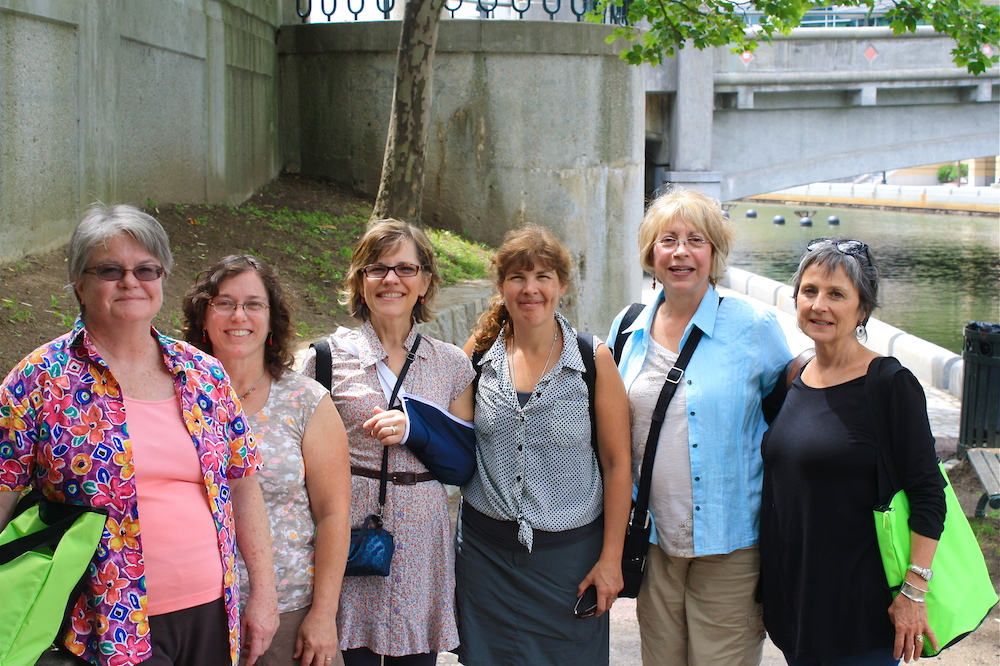
My traveling companions (left to right): Leslie Mendelson, Karen Berk, Hope Herting, Jenn Snyder, Teri Silsby, and me. Jenn, a Rhode Island native, was our wonderful hostess AND tour guide.

Among the many tempting vendors: Master weaver Randy Darwall, 
whose scarves are pictured above

The Glimakra booth, which to me is pretty much 
the weaving equivalent of Disneyworld....

None of us took classes, but instead visited the exhibits and toured the Providence area -- again, guided by Jenn Snyder. The fashion show was a highlight and spurred a lot of discussion. The first-place winner was not a weaver, for instance, but the garment itself was masterful and showed great skill in surface design, couture sewing, and garment design.

(I had an item juried into the show -- but found out at the last minute that my garment had been disqualified because there was a tear in the back seam. I was told that they had received the garment that way, but there is no way on earth I would have shipped it like that. Most likely, it tore when a model tried it on. Still, quite honestly, the fabric was fragile and I had not reinforced the seam. I learned NOT to do that again, for sure. A painful experience but also a lesson.)

Moving on: the Complex Weavers exhibit, named "Complexity," was a highlight of the conference for me. Again, for those who don't know, Complex Weavers is an international organization of handweavers who are interested in working with more than four harnesses -- although four-harness weaving is also explored by this group, as it can offer many challenges for advanced weavers. 

A dimensional wall hanging by Susie Taylor,
double woven on 10 shafts with an origami layer 

Bonnie Inouye, whose work I admire greatly, wove this Echo weave piece
with looped and interlocked strings on 24 shafts

A detail of a Jacquard-woven piece by Lois Bryant,
in weft-backed 8-shaft twills and 16-shaft satin

One of my personal favorites: a scarf by Lesley Willcock 
created from network threading, woven on 32 shafts 
in a treadling range of 8-end satins

The first-place winner was another piece by Lesley Willcock: a 4-color double weave
using an extended parallel on a network threading and woven on 32 shafts

Another personal favorite: a fancy twill scarf by Carol Wooten woven on 32 shafts

This scarf is by Elizabeth Calnan, woven on 32 shafts 
in a double-weave point threading

So much to see, so much to learn! With all the conversations, reading, and viewing, my head was fit to burst. The ideas will last me for at least two years -- until the next Convergence, just about....