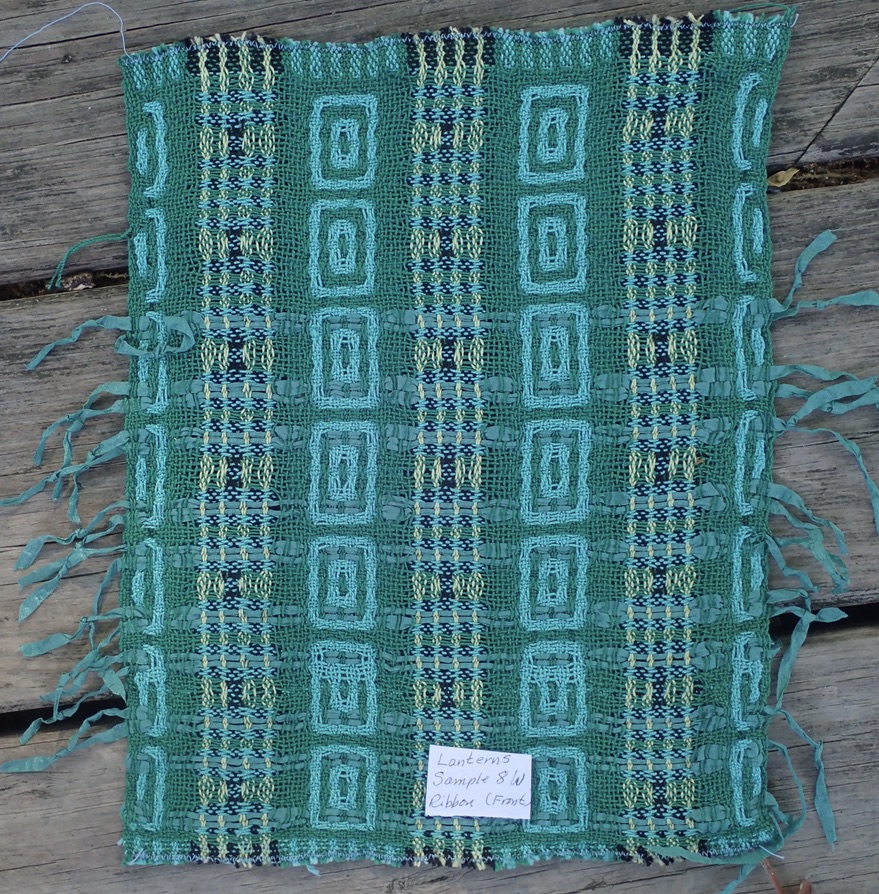
Showing posts with label Fiberworks. Show all posts

Wednesday, August 27, 2025

Name Drafts Aren't Just for Overshot....


Above is a name draft using -- why not? -- the name Michelangelo, employing an Echo threading and a twill tieup and treading. A name draft is a fun and fairly easy way to design a weaving pattern, working with the name of a friend or loved one or, in the case of Michelangelo, an icon, as a sort of coded message in your weaving. You can achieve this either by hand using graph paper or using weaving software.

(A bit of self-promotion here: I will be teaching a one-day workshop on this subject, called "Name Drafts, 8 Shafts, and Parallel Threadings," at Convergence 2026 at the Sheraton New Orleans in New Orleans, LA, next August 12-16. Registration will begin soon, but the schedule hasn't come out yet, so keep checking back on the link above for updated information. The subject of this post is NOT how to create name drafts with Echo threadings because I wouldn't want to give away the gist of the workshop. However, if you keep reading, I will walk you step-by-step in creating a name draft using deflected-double-weave techniques.)

As for name drafting itself, let's define our terms. We'll start with an impeccable source, Madelyn van der Hoogt, who wrote in Handwoven magazine on January 22, 2018, "A name draft is an arbitrary way to create a threading draft (usually threading, though it can be used for blocks or for treadling orders, too). There are many ways to do name drafting, but one is to assign a letter to each shaft: A = 1, B = 2, C = 3, D = 4, E = 1, F = 2, etc., for four shafts, for example. Then you just thread the number corresponding to the letters from words or phrases. Naturally, this doesn't necessarily give you a threading that can be used, so then you adjust. Most often name drafting is used for overshot."

But not just for overshot, as you can see from my Echo example above. As Marg Coe points out in the introduction to her online course, "What's in a NameDraft?", "Traveling outside name-drafting with traditional overshot we will design shadow weave, deflected double weave, double weave, rep, Corris effects...." All these designs are possible using name-draft techniques.

Sneak preview: In the upcoming issue of Handwoven magazine, I have used a name draft to create a deflected-double-weave design based on the name of my beloved grandfather, George Relyea. (I won't give away any more of the story, which is the "Yarn Lab" project in the next issue -- and it brings some exciting news! 'Nuf said.)

Here's how George Relyea weaves up in deflected double weave on 8 shafts. I really like the design!


So how do you do this? I work with Fiberworks (the Mac version, which varies slightly from the PC version, but these instructions should get you there on either system).

Step 1) Pick a name. (Please note that some names do work better than others, so, as Madelyn writes, you have to make adjustments.)

Step 2) In the "Tools" drop-down menu, (found at the top right side of the drawdown page as you begin), click on "Namedraft" and then type the name in the box provided. No spaces, no initial caps. The name-draft window gives you all sorts of choices, but for the purposes of this tutorial, just leave it as is. (You can experiment to your heart's content after you've learned the basics.)

Step 3) Click on "Accept" (making sure you have one color in the warp and another in the weft), and there you have it! An overshot-looking design (more like turned overshot, but anyway) that's built on the name you chose. 

Here's what the beginning of my name draft looks like on my computer screen.


Step 4) On the "Tools" menu, click on "Block Substitution." Then click on "Classic Weaves," and  "Overshot, Multishaft." Then click "Accept." My draft now looks like this.


Step 5) Using the shaft-shuffling tool at the top of the Fiberworks window (the one that has a single arrow pointing both up and down with a horizontal line going through it), use the cursor to change shaft 3 to become 5 and shaft 4 (which is now on shaft 3) to become shaft 6. This means that your threading blocks always alternate between shafts 1 or 2 and shafts 3 or 4. This is based on the Stubenitsky method of drafting deflected double weave.

Step 6) On the "Tieup" dropdown menu, click on "Shafts and Treadles," change the number of treadles to 8, and then click "Set."

Step 7) Again on the "Treadling" drop-down menu, click on "Weave as drawn in," making sure that you unclick the box for "colors." Then click "Copy Exactly as Drawn." 

Step 8) At this point, your draft will look like a mess, but that's because you need to change the tieup to a deflected-double-weave tieup. These tieups are always boxes of 2 shafts and 2 treadles that are either 1) all black, meaning two adjacent shafts will be lifted together twice in the treadling, 2) all white, meaning that two adjacent shafts will stay down together twice in the treadling, or 3) weaving plain weave.

My tieup looks like this: (Note: To repeat, I'm following the Stubenitsky method in the tieup, in which -- for an 8-shaft draft -- the four shafts and treadles on the bottom left and the four shafts and treadles on the top right are tied up to weave plain weave, while the four shafts and treadles on the top left and the four shafts and treadles on the bottom right weave the pattern, comprising four-unit squares of two shafts and two treadles which are either all black to lift the warp or all white to lower the warp. The plain-weave portions of the tieup are always stationary, while the blocks of 4 black or 4 white can be moved about to alter the pattern.) Here's what my tieup looks like.


Step 9) To see your design as deflected double weave, you need to change the warp colors so that every other block of four warp ends is one color and the adjacent blocks are another color.  And you need once again to click on the "Treadling" dropdown menu, click on "Weave as drawn in," and click on "Copy Exactly as Drawn" so that the colors in your weft alternate block by block as well.

And this is what you get with my name draft.


Not bad for an hour's work, don't you think? And this technique allows you to encode something special, unique, and meaningful to you. Again, if you're interested in learning the full spectrum of possibilities for name drafting, I urge you to check out Marg Coe's free, live course (click here).

Thanks for reading!


My "George Relyea" name draft again, this time with a different tieup.


Tuesday, September 24, 2024

Echo... Echo... Echo on 8 Shafts


It all started with Handweaving.net, as I'm guessing it does for many of us. 

One of the easiest ways to create an Echo design is to look on Handweaving.net for patterns with advancing-point-twill threadings, such as Ms and Ws, Gebrochene, or Crackle. These threadings can easily be made into Echo designs, simply by clicking "Parallel Repeat" on the "Warp" drop-down menu in Fiberworks Silver and then interleaving a threading line that's parallel to the original threading, separated by an interval of half the shafts you're using.

A bit of weaving terminology here -- because I remember wondering what in the world "interleave" meant as I was learning to work with parallel threadings. I always thought it meant inserting a page into a book. Actually, in weaving, it's sort of like that: You insert a second threading line above the original threading line -- so that each parallel thread is "interleaved" between two threads in the base threading -- A/B/A/B and so on. 

In other words, if you take a simple 8-shaft point draw like this...

You can interleave it with a parallel threading that is 4 shafts above it....


This represents an interleaved threading that is parallel to the original threading (there are lots of variations on this, which I won't go into in this post). Typically in an Echo threading, the parallel threading line is half the number of shafts above the original design, as it is in the diagram above: Threads 1, 2, 3, 4, 5, 6, 7, and 8 have a parallel threading line that is 4 shafts above them on an 8-shaft loom. The overall Echo threading -- a.k.a. parallel threading -- is now 1, 5, 2, 6, 3, 7, and 4, 8. Then, when you reach the base-line thread on shaft 5, the parallel thread "above" it is on shaft 1. The reason: Remember that Echo is a technique based on twill, so, just as with a straight twill -- 1, 2, 3, 4, 5, 6, 7, 8 -- the next thread for a straight draw is 1. (Because we don't have 9 shafts on our loom, you have to corkscrew around to shaft 1 in your threading in order to weave a continuous twill line.) 

Echo calls for two colors in the warp, one for each threading line. (You can also design Echo using 3 or 4 parallel lines, each with a different warp color, but again, we won't get into that.) Another key to this technique: Echo uses a twill tieup and, typically, a sett that is somewhere between that recommended for twill and that recommended for double weave. Also, Echo usually requires a weft that is about half the grist of the warp threads. These are not rules, just recommendations, helping to show off the warp pattern. (Echo designs are warp-emphasis designs.)

So here's where I began, with this lovely 8-shaft advancing-and-descending-point-twill design on Handweaving.net:


I really like the luminous quality of the chartreuse weft, defined by the grass-green color of the warp.

And simply by clicking "Parallel Repeat" on the Warp drop-down menu in Fiberworks (a feature, like networking, that is only available on Fiberworks Silver), I got this variation:


I confess that I tried hard to find the draft on Handweaving.net so that I could give you the number to look it up -- searching under "Twill," "Ms and Ws," "Point Twill," and even "green," but I couldn't find it! The site is so full of treasures, you could spend an entire day looking at drafts and saving the ones you like....

Anyhow, I decided that the above design was too stretched out width-wise, so I created a version in Jin (which is basically Echo with a tabby tiedown in the treadling) in order to balance the motifs.


I like the simple variation of colors in the warp: bright green and turquoise, with a weft of slightly lighter green. And then, while I was shopping at Convergence in July, I came upon a 4 oz. skein of chartreuse Tencel and a 4 oz. skein of hand-painted Tencel in a variety of blues (at the Eugene Textile Center booth, which was full of temptations). Both skeins were 10/2 -- perfect! And here's the result (another version of the photo you saw at the beginning of this blog):


Along with being one of the most environmentally friendly of all the weaving fibers, Tencel also has a great sheen to it, giving the fabric a gloss similar to silk. Plus it has considerable tensile strength (hence the name Tencel, I'm guessing).

Because I didn't feel like plying lots and lots of fringe -- which is a graceful accent to a scarf but takes a lot of work -- I wove a double-weave tube at both ends of the scarf. All you have to do is fold it inwards, iron it flat, and blind-hem-stitch the sides of the tube together. 


Here's the drawdown for weaving a plain-weave tube on an Echo threading:

I'm considering -- that's the operative word, "considering" -- writing a second book, this one about Echo, offering designs for 8 shafts only, as that's the easiest way to learn this technique and 8 shafts seems to be the number of choice for the majority of weavers. This pattern would be one of them and, of course, I will have to weave up another 11 projects before I even start writing the book. So, if this book gets written, it will be a while....

Thanks for reading!


Monday, December 11, 2023

My Gift to You: a Free Cowl Pattern in Echo on Four Shafts

My gift to you this season: A free pattern (see below) for a handwoven cotton cowl in an Echo/Crackle design* on four shafts. No matter what holiday you celebrate this winter -- and even if you don't celebrate any holiday at all -- you have my endless thanks for following this blog and my work, for being a part of the larger weaving community that means so much to me and to all of us.

So what are we looking at? A pattern that calls for less than a yard of woven fabric and takes up less than 12" weaving width on your loom. To create the cowl, the fabric is sewn into a circle using a flat-felled seam on your sewing machine or by hand.  


Here are the instructions.

Warp yarns: 10/2 mercerized cotton in two colors (colors that differ in both hue and value -- for my cowl, I used purple and gold)

Weft yarn: 20/2 mercerized cotton (I used bright red)

Warp: Wind a warp of 400 ends plus two ends at the beginning and two at the end for floating selvages. Length: one yard of fabric plus loom waste (more if you want to sample first, to test colors and to doublecheck your threading, which I highly recommend).

Sett: 36 epi (sounds dense but this is a warp-emphasis fabric with a fine weft)

Width in reed: 11.11" (that's about 11" for the fabric plus one extra dent on either side for the floating selvages)

Threading:


Tieup and Treadling:


For those of you with a table loom, here's the liftplan:


Here's what the drawdown looks like in Fiberworks, showing one complete motif (one full treadling repeat):


Instructions:

Weave three full treadling repeats (three motifs), beginning and ending with about one inch of additional pattern for your seam.


Cut off the fabric, serge or otherwise secure the beginning and end, and then immerse it in a bin of warm water using a bit of dish liquid or shampoo (or Orvus Paste or other soaps that are good for fiber). Line dry and then iron the fabric on both sides.


Create a circular cowl shape by sewing both the beginning and the end of the fabric together width-wise using a flat-felled seam on your sewing machine (or stitching by hand) with thread of a color that blends in well with your fabric. The goal is to make this join as invisible as possible. For instructions on how to sew a flat-felled seam, consult the internet, where you'll find videos, photos, and written instructions on how to do this.

I just designed this pattern for my workshop, "Echo and Jin: Variations on a Theme," because I like to offer designs for all kinds of shaft looms, from 4 shafts to 32 shafts (but that's as far as I go).

*One note: While this pattern might easily be classified as Crackle -- because it uses a Crackle threading and treadling (without the tabby shots in between), I have modified it with some Echo techniques. For instance, there are two colors in the warp (keeping in mind that, although this is not typical with Echo, two colors can be woven on consecutive shafts, so that the interval between parallel lines is 1). I suppose you could say that this pattern is, ultimately, a mash-up between Crackle and Echo....

If you have any questions, send me an email (again, click on the "Email" link in my profile section of this blog). And thanks for reading!


Tuesday, November 17, 2020

Gebrochene, Echo and Jin with Fiberworks: Putting 'The Earl' Through His Paces


Ah, the old Weaver's magazine... such an endless source of inspiration! Recently, I was looking at an issue from 1997 and came upon a story by Marjie Thompson about the source of the above draft, "The Earl's Canvas." (Thanks to Thompson for sharing it with me.) She had given a talk to our guild about this years ago and I never forgot the beautiful silk scarf she wove. 

The pattern was discovered in a portrait of John Erskine, second Earl of Mar in Scotland, in the National Portrait Gallery in Edinburgh. Painted in 1626 by Adam de Colone, it features a Jacobean noble with a lace ruff and badge of office. 


What's interesting to weavers, however, isn't the painting itself, but rather the canvas it's painted on. According to Thompson, a museum curator analyzed the pattern in the 1970s and found that it's actually a 14-shaft Gebrochene design that was probably an old tablecloth. 

And what is Gebrochene (pronounced in German "geBROKena")? Literally it means "broken," but to weavers it's basically M's and W's. According to Thompson:

"It's a twill interlacement with an elaborate threading and treadling and a twill tieup. Usually both warp and weft are the same yarn, historically linen. Gebrochene tablecloths are pictured in medieval art and Gebrochene drafts are found in... books from the early 17th century. Patterns can be quite elaborate; one design by Jacob Angstadt shows over 900 ends in one repeat."

At last we get to the point of this blog post, which is: This beautiful draft can easily be translated into an Echo threading. And a Jin design. And Shadow Weave and Rep and Double Weave, all through the magic of Fiberworks.

You start by reducing the "The Earl" threading to 8 shafts (because not everyone has a 16-shaft loom). Next, under the Treadling dropdown menu, select "Weave as drawn in" and then make the treadling tromp as writ. Then select "Draft" and "Thickness" and click on "Exactly as drawn."


Next, using the Warp dropdown menu, click on "Parallel Repeat." In the box that opens, select "Extended Parallel," "Shafts shift by 4" and "Also duplicate colors and spacing." Then click "Apply." (And then "Close.")


Next, still in the Warp dropdown menu, click on "Fill Warp Colors." In the space that says "Single Color A," scroll down and select "AB." Then click "Replace." (Because this is just an exercise, I've simply gone along with the pre-selected colors in boxes A and B in the "Fill Warp Colors" box. You can select your own colors by using your cursor to drag colors from the "Colors" column that appears when you click on "Fill Warp Color.")

Hard to see in the above image, but if you look closely you can find blue and aqua in the boxes above the threading, indicating the colors of the warp threads below.

Next, create a 4/4 ascending twill tieup, which is a classic Echo tieup. The elementary way to do this is to draw it in by clicking on the boxes you want -- but to do it faster, you can just fill in the tieup for the first treadle and then click on the "Tieup" dropdown menu, select "Twill Repeat" and then "Step Up," "Step by 1," "Treadles per group 1" and "Apply."


Yes, it's Echo and yes, the Earl pattern is identifiable -- but it has long floats. (A good rule of thumb, according to Bonnie Inouye, is that floats in Echo should be no longer than 5. This is where the "Float Search" function on the "Tool" dropdown menu in Fiberworks comes in handy.)

Next step, alter the tiedown by breaking it up so that the floats aren't as long. Here's an example.

The motifs are still a bit squashed, right? There are ways to fix that -- one of them being to change the treadling.


Another way to alter the "flattened" Echo draft is to add tabby to the tieup, changing the structure to Jin.


You can alter the Jin design a bit by changing the tieup to create what Bonnie Inouye describes as "decorated Jin" -- changing it from a 4/4 tieup to a 4/2/1/1 tieup (plus tabby, of course).


Now that's a design befitting an Earl, don't you think? At the risk of losing readers, I will show you a few more designs. Here's how the Earl looks as Double Weave (both front and back views).


And here's a Rep version:


And then there's Shadow Weave -- although I'm not sure I like it so much.


So there you have it: "The Earl" as interpreted for extended parallel threadings, 400 years after it was used as the canvas for a nobleman's portrait. 

Thanks for reading!

[For further study: Eva Stossel is a blogger and peerless weaver who wrote about this subject on her blog and in the Complex Weavers Journal in 2012. You can read her blog post by clicking here.] 


Saturday, July 18, 2020

Zooming Ahead with Deflected Double Weave


8-shaft Deflected Double Weave sample by Karen Berk. 
Warp and weft yarns are 10/2 Tencel/cotton (in fuchsia) 
and 18/2 Jagger Spun superfine merino.


Like many of us these days, I've been Zooming a lot with friends and family. All of my workshops through January have been cancelled, so I've begun teaching on Zoom -- in some cases, to replace my cancelled on-site workshops and in other cases because guilds are scrambling to offer remote workshops for this fall.

While Zoom workshops can't replace face-to-face communication and hands-on learning -- not to mention the joy of actually touching a handwoven sample -- online workshops can offer a worthwhile learning experience. It all depends on the investment of the students, in my view. And I can't say enough about the investment of the weavers who took my recent workshop, "Deflected Double Weave for Collapse Fabrics."

It served as a fundraiser for the Weaving and Fiber Arts Center here in Rochester, NY (the teaching arm of the Weavers' Guild of Rochester) and also helped test-drive the Zoom format for both the center and our guild. Weavers joined us from near and far -- from California to Canada to Michigan to Virginia to Delaware -- with the bulk of us coming from the Rochester area. 

Over the course of eight sessions in 2 1/2 days -- June 22, June 29 and July 6 -- we gathered on Zoom to study handouts and samples, to analyze drafts in Fiberworks, to view PowerPoints and, thanks to Google Drive, to survey everyone's work. In between sessions, we communicated largely via email and sometimes on the phone. 

Here are more samples:

 
12-shaft Deflected Double Weave sample by Lillian Whipple.
Warp and weft yarns are 10/2 cotton and lace-weight wool/silk.
The gold yarn is the black motifs is real gold.


4-shaft Deflected Double Weave sample by Barbara Mauger.
Her warp and weft yarns are 8/4 Tencel. 
The gray weft yarns are wool crepe.


12-shaft Deflected Double Weave sample by Linn Sadjak.
Her warp and weft yarns are 10/2 cotton. 
In this sample, she added picks of rayon-tape yarn.


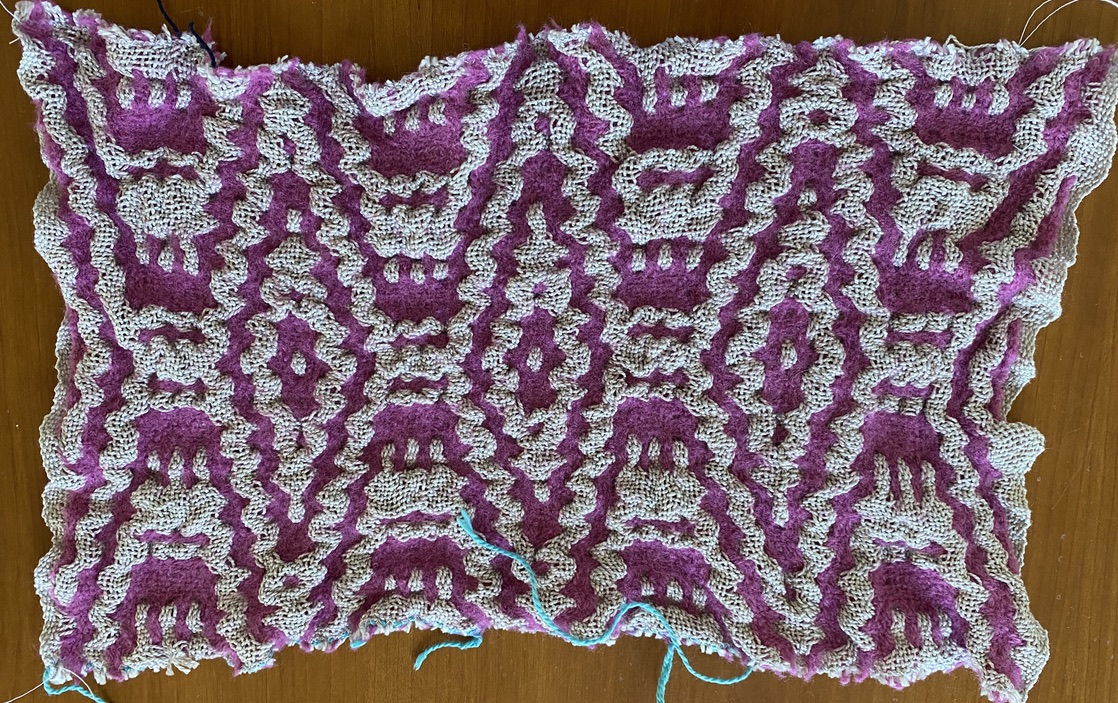
This sample by Jaime Pierce has 10/2 cotton (off-white)
and 18/2 Jagger Spun superfine merino (magenta) in warp and weft.


This is a sample by Eleanor Hartquist shown before finishing.
The gold-colored wefts in the upper horizontal stripe (mostly black) 
will draw the fabric in, creating vertical pleats, after washing.


This 4-shaft sample by Marianne Antczak
uses Colcolastic in the weft (in purple/pink) 
to draw the fabric in width-wise.


Cindy Greenfelder wove this 8-shaft swatch 
using 18/2 Jagger Spun superfine merino (in dark purple) 
to create puckers and pleats after finishing.

My takeaway: Despite the pandemic and social distancing, weavers want to keep on learning. And let's face it, weaving can be a solitary pursuit, so we thoroughly enjoy the company of other weavers. It's why we gather.

For anyone considering teaching or taking a Zoom workshop, I have a few lessons. First off, schedule a dress rehearsal within a week before the class. That way, you can iron out all the kinks -- technology problems, questions about the workshop format, questions about the weaving itself -- before the actual work begins. Who wants to waste time with technology when we could be talking weaving, right?

Another point: For teachers, it's useful to have a document camera on your desk so that everyone can see your samples up close, pick by pick, in focus, well lit and not in motion. (For those of you who have tried holding a sample up to the camera on your computer for others to see, you'll know what I'm talking about.)

A third idea, suggested by a weaver in another Zoom workshop, is to set up a Google Drive file dedicated to the workshop. I uploaded handouts, photos, drafts and other resources and, more important, created an individual file for everyone so they could upload their photos and then I could share them with the group. 

One big benefit is that you can have another teacher take over (in Zoom language, they serve as a co-host, meaning that they can share images from their home computer). In our case, we were fortunate to have Joyce Robards (whom I call my "Weaving Mother" even though we are not that far apart in age) give a presentation on Marian Stubenitsky's newest book, Double with a Twist, which has a different approach to drafting designs.

The course evaluations surprised me, with some folks saying that they actually preferred the Zoom format, mostly because they could weave on their own looms (no schlepping everything to the workshop site) and they had plenty of time to absorb information and work on their samples (no rushing to get everything done in the normal format of 2-1/2 days).

To me, this means that, while nothing can replace the learning that comes with an on-site workshop, much can be gained by teaching or taking a workshop over Zoom. Maybe the greatest benefit is that online workshops can bring weavers from around the globe together virtually, building a sense of community and adding another option to learn about our craft.

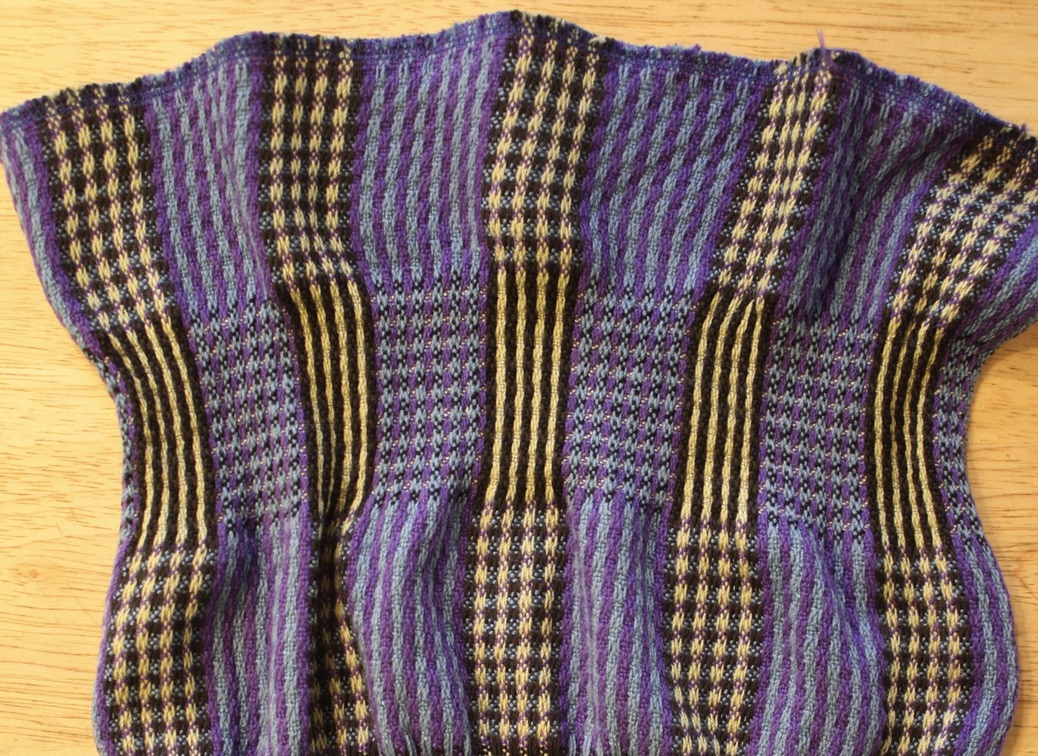
I'll close with a Deflected Double Weave sample I wove on 12 shafts using Colcolastic in the middle section (black and gold vertical stripes) to achieve width-wise shrinkage. I wove this in 10/2 cotton, using four colors in both warp and weft, substituting the Colcolastic for one of the colors as I wove the mid-section.


Thanks for reading!