Monday, March 13, 2017

Collapse Designs on 4 Shafts: a Sneak Peek at Upcoming Workshops


There are SO MANY ways to produce textured fabrics! And it's relatively easy to weave complex-looking fabric on just 4 shafts. Which is the subject of a workshop I will be teaching this summer at the MAFA (Mid-Atlantic Fiber Association) conference at Millersville University in Pennsylvania.

The sample pictured above, for example, looked like this before washing and fulling.


The warp is 20/2 pearl cotton and the weft is 18/2 merino. You'll see that the weft floats in alternating blocks on the top of the fabric, but not on the back. After washing and agitating in hot, soapy water, the weft floats will full and shrink, pulling in the cotton warps in a checkerboard pattern. The image at the top of the page shows what was the back of the fabric on the loom -- which is the far more interesting surface due to the checkerboard pattern.

Here is the draft.

I did 3 other samples on this 20/2 cotton warp. Here are the images of the samples after washing.

20/2 pearl cotton alternating with 18/2 merino weft stripes in plain weave

18/2 merino weft floats alternating with 20/2 pearl cotton weft in plain weave 

Same as above sample, but with merino weft floats on one side only

I particularly love the texture of the middle sample, as it looks the same on both sides and it shrank up the most (width-wise) of all the samples -- making it spongy and lofty. I think it would work well as a lightweight jacket or coat fabric. With lots of color in the warp and weft, of course.

Here are some more photos of samples I've woven up and washed in preparation for this workshop.

Deflected Double Weave

Double Weave (two layers woven simultaneously)

Differential shrinkage using merino and superwash wool

Collapse fabric using a wool/latex weft (warp is on the horizontal)

 Fulling with woven-shibori technique

 Weft floats fulled and cut to create an eyelash effect

So many techniques, so much to learn. I will be teaching another collapse-cloth workshop -- this time on both 4 and 8 shafts -- at the Hartford Artisans Weaving Center at the end of the summer. In September, I'll give a Power Point presentation on the subject to the New York Guild of Handweavers -- hopefully with lots of new photos to show from the summer workshops.


Sunday, February 12, 2017

More from the Warp That Keeps on Giving: Turned Taqueté


At this point, the problem is making a decision -- ANY decision, for crying out loud! I have been able to weave so many patterns on this warp -- an extended parallel threading -- that it's hard to choose which one I like the best.

So far, I have woven maybe maybe 10 different patterns, using two different tie-ups and lots of different treadlings. I've finally decided on the two in the photo above. (Not one, but two -- but that's OK, because I like the way they work together.)

Both patterns are treadled as Turned Taqueté, which I've blogged about extensively because it's such a beautiful structure. The diamond-shaped pattern is created with a simple advancing point twill treadling. Here's how it looks close up:


And here's the drawdown:
For the other pattern, I created a networked treadling based on an initial of 2. Here's the drawdown for that.


So now I have about 8 yards left to weave, which is hopefully enough to make a garment. Lots of keeping track of complicated treadlings -- once again, an argument for purchasing a computerized loom....

And here's one more image, this one of Echo Weave woven on the same warp using a point-twill treadling. My thinking is that this pattern looks good close up, but from a distance of a yard away or more -- which is the kind of distance I like for viewing a garment -- it doesn't show up as well.


Thanks for reading! More to come as I begin creating collapse-weave samples on my table loom, in preparation for workshops I'm teaching in the summer.

Tuesday, January 17, 2017

The Warp that Keeps on Giving: Echo, Jin, Double Weave, Shadow Weave, and Warp Rep All on One Threading


How do you weave a countless number of structures on one warp? With an extended parallel threading, of course! This particular technique offers a lot of "bang for the buck" for weavers. All you have to do is modify your treadling and, in some cases, change the tie-up. If you're REALLY ambitious, you can change the tie-up and re-sley as well to achieve Double Weave or Shadow Weave.

What is an extended parallel threading? For those who follow the work of Marian Stubenitsky and/or Bonnie Inouye, it needs no introduction. For the rest of us, all it means is that, for starters, you use two colors in your warp, so that you can thread them A-B-A-B, etc. (A being your first color and B being your second). Then, instead of threading a straight draw of 1, 2, 3, 4, 5, 6, 7, 8 (just as an example), you thread your two colors using the same line, but separately, at a set interval. 

For example, if you decide you're going to thread at an interval of 4, for an extended parallel threading on a straight draw, you will thread it this way: 1, 5, 2, 6, 3, 7, 4, 8, 5, 1, 6, 2, 7, 3, 8, 4, alternating between color A and color B. Here's a drawdown, by way of example. (I've posted it before, but it bears repeating.)


So your tie-up allows you to lift every other thread in an ascending twill order. This is the basic idea behind the structures I have been weaving. Because I like to paint warps -- and because I like to paint two separate warps in complementary but different palettes and beam them together and then thread them A-B-A-B in an extended parallel threading -- I decided to create an advancing point-twill using this technique. 

Here are some drafts and photos of what I've weaving. 

Variation #1: Echo

Here is the the drawdown, with a tie-up and treadling for Echo. Note that this is simply an advancing twill treadling.
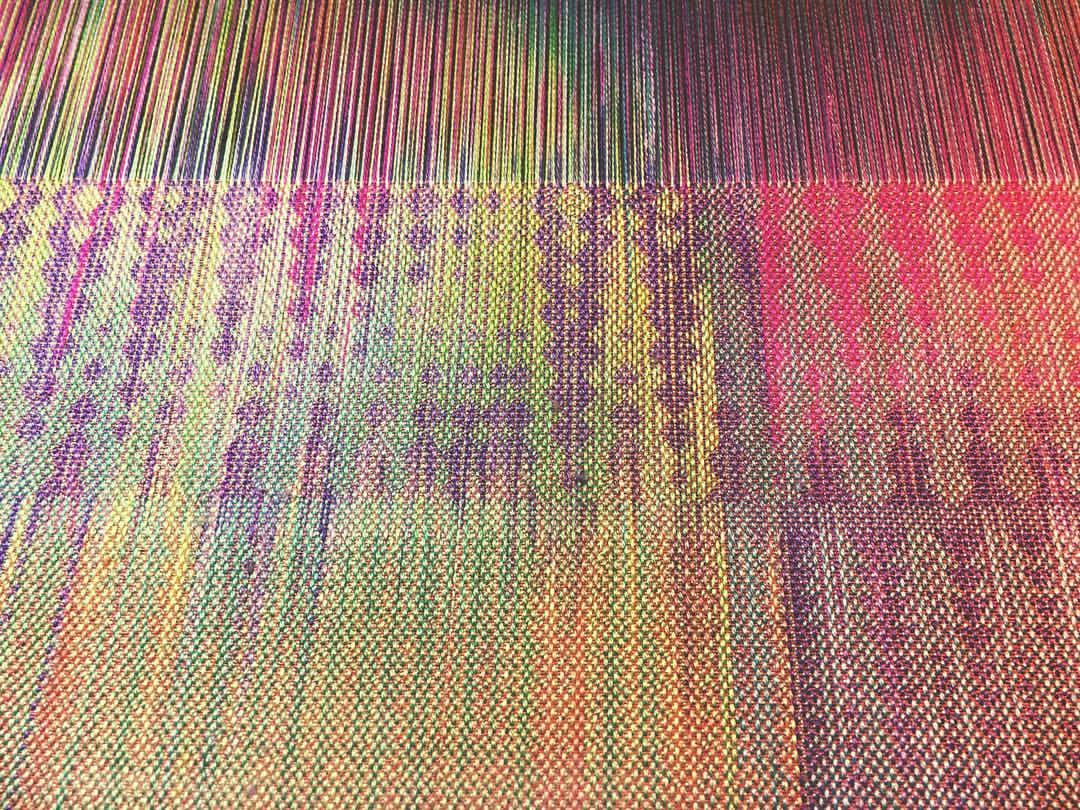
And here is a photo of the sample I wove. You'll see that I didn't weave the entire treadling, because I was just trying to get an idea of how it would look.


Variation #2: Echo

Next treadling for Echo, same tie-up. This treadling is for an advancing-point twill.


My woven sample, below. I love the way the pattern seems to sparkle, which enhances the color shifts.


Next, I crawled under the treadles to do another tie-up. (Truth be told, I usually make an error when I'm tying up and have to start all over again. Which causes a lot of sweating and cursing, which is not to be written about in a blog post.) 

Variation #3: Doubleweave 

Here is the drawdown for treadling as doubleweave. I will not show you my sample, as I really messed up! I had to re-sley the reed to make the warp ends much denser -- and somewhere along the way my shed got really boggled up. I do have a sample, but again, not for public consumption ;o)


Yes, this would work well with a collapse-cloth technique, with one layer shrinking and pulling in while the other layer would "pouf" and add texture. Even with the poor shed I had -- owing mostly to the fact that I was using two different devices (Texsolv and metal hooks) to tie up my treadles and their lengths varied -- I could tell from my sample that this design has promise.

Variations #4 and #5: Jin

Then I got down under the loom and re-did my tie-up to weave Jin -- one of my favorite structures because it is so versatile. Here's the first treadling I used. If you look at the treadling, you'll see that, if you remove the tabby, it's the same advancing-twill sequence as in variation #1 above.


And here is the second treadling, an advancing point-twill. Again, if you take away the tabby, it's exactly like variation #2 for Echo.


Here is how the two samples wove up. (The first treadling appears at the bottom of the photo and the second is at the top.)


Variation #6: Jin

Here's yet another treadling, the results of which I love!

The sample:


Variation #7: Rep


There are a countless variations for an extended-parallel threading like this. One additional structure I did not mention was shadow weave. Here's a drawdown I came up with.


However, this post is getting way too long and it's taking way too much time! Suffice it to say that I'm hoping to create a workshop out of this. And as for all the samples I have been weaving: I beamed a 12-yard warp, 46" wide, using 20/2 silk sett at 40 ends per inch. The weft is, for the most part, 60/2 silk.  

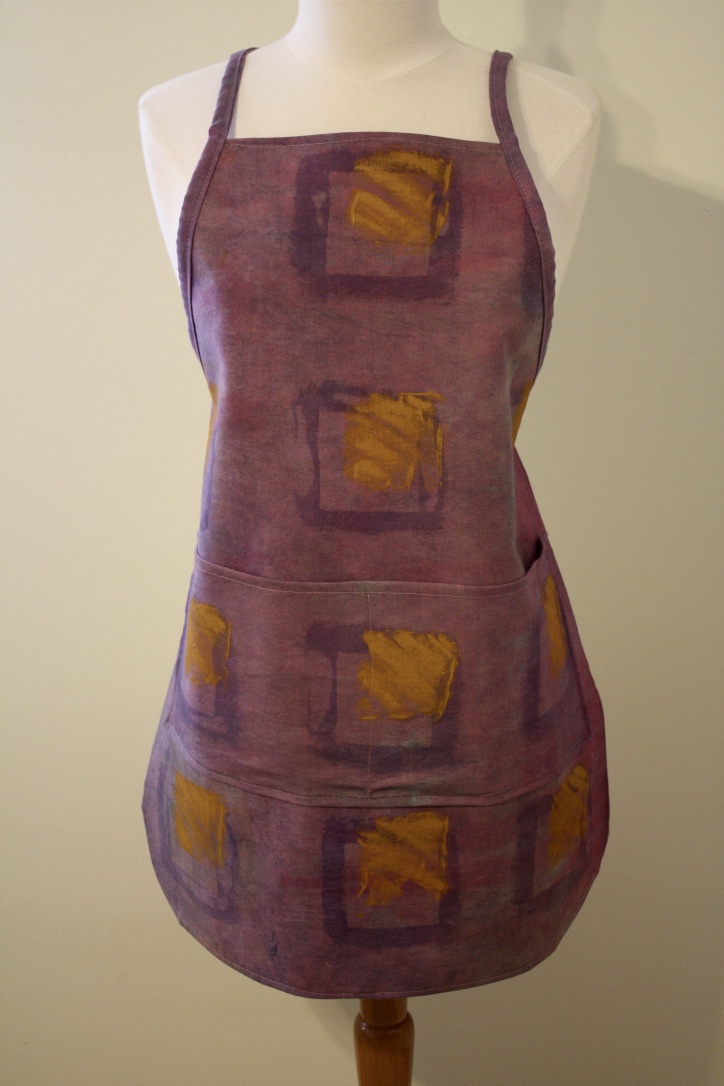
I'm weaving yardage for a garment. Most likely, I will use four or five different treadlings for Jin -- I might even add a networked treadling in there somewhere -- and alternate them randomly throughout the fabric. I can't choose just one, so I have to weave them all.

And here's the photo that inspired this project to begin with. I can't attribute it to any source, because I found it on the internet long ago. The combination of pinks and greens is irresistible!


Thursday, December 15, 2016

DIY Quick and Easy Craft Apron (or Holiday Apron, or Any Kind of Apron You Want to Make)


For some reason, I like aprons. They make a statement and they certainly broadcast the fact that somebody's working here! Sort of a colorful costume, in a way. And they're tidy, whatever you're up to.

Anyhow, this being the holiday season and considering that I have a lot of hand-dyed cotton hanging around, making aprons seemed like a good idea. I dug up an old one that I wear a lot, copied the shape, and added a few touches of my own. I liked the results so much that I thought I'd share it.

(One caveat: These instructions don't have as many photos as I like to use, simply because I didn't take photos as I was working. So these instructions are wordier than they probably should be.)

Anyhow, here's what you need.

Gather Your Materials

  • 2 yards of hand-dyed or commercially printed cotton muslin or cotton duck or canvas. (I used muslin in a natural color. For the apron above, I dyed the muslin with Pro MX Fiber Reactive Dyes and them embellished it with textile paints and Shiva Paint Sticks. Anything will do, but to me the heavier cotton canvas fabrics are a bit harder to dye, simply because they are stiffer.)
  • If you use regular muslin, as I did, you may want to back it with another layer, to give your apron more "beef." I sandwiched both fabric pieces together using "MistyFuse" iron-on stabilizer, available at Joann's or online.
  • Pattern-tracing paper
  • Thread, scissors, sewing machine, of course

Make the Pattern


Using a sheet of pattern-tracing paper, cut out a rectangle that's 27" long x 22" wide. (Please ignore the blue tape on my pattern. I just happened to piece some odd leftovers together.)

Make curves at the corners on the base of your pattern (the bottom part of the rectangle that is 22" wide), starting 2" above the base of the pattern at each corner. (You see these curves at the bottom and top left corners in the photo.)

For the neck edge and armholes (the right side of the pattern in the photo), trim the pattern this way: Cutting away 6 1/2" from each corner, leave a 9" wide line at the top of the rectangle. Cut away the armholes starting on either side of that 9" wide line and curving down so that the side of the pattern is a full 18 1/2" inches from the base.

(Another way of stating this: Before you cut away the armholes, make a mark on the pattern 8 1/2" down on either side from where the neck will be. Then mark both sides of the neck, starting at 6 1/2" from the corner on both sides. If this doesn't make sense, just email me at dkovn[at]hotmail.com.)

Cut and Prepare the Fabric

As I suggested, a two-layer fabric is preferable if you're using muslin or quilter's cotton. For the first layer, you will want to cut the fabric a full 1" larger all around. (This is so that you can hem it all around.) Cut the MistyFuse (or whatever stabilizer you will use) the same size as the pattern and cut the back piece of fabric the same size as the pattern.

If you're making an apron that is only one layer of fabric, you will still want to cut it 1" larger than the pattern all around.

If you're using two layers, you will want to sandwich them together at this point. I took the top layer (the front of the apron) and placed it face-side down on my ironing board. Then I placed the MistyFuse on top of that, centered so that there was 1" of the top fabric all around it. Finally, I placed the "back" fabric on top of the Misty Fuse and ironed all the pieces together.

Hem Your Apron on All Sides


All I did was iron the edge of the top layer of fabric toward the back of the apron, all around -- first, ironing the hem in half and then turning that half inward and ironing it once again. This avoids any frayed edges. I sewed it about 1/4" from the edge on my sewing machine. (I actually sewed it with the back of the apron facing up, to make sure I caught all the edges of the hem.)

You will have to work your way gently around the curves at the base of the apron, coaxing and folding the fabric in as you sew.

Making Your Apron Strings


As you can see, you will make just one apron string. Starting at the back where it ties, you sew it onto the armhole and then leave a big loop to go over your head. Then you sew it to the other armhole and detach it for the other side of the tie.


Nice idea, eh? You can use store-bought double-folded bias tape for this, if you like. But I wanted to use my original fabric and, since I didn't have quite enough to cut out the ties on the bias, I simply cut out long vertical strips of my fabric.

The dimensions for your apron strings (which I also call "tape"): Cut out enough fabric, sewing the pieces together as needed, to get a length of 120" (shorter if you're short like me) and a width of 2". Fold the piece in half length-wise and iron it, so that you now have a two-edged tape that is 1" wide. Then fold the two raw edges in toward the middle and iron again (creating your own double-folded bias tape, except it isn't on the bias, but anyway....)

Begin by stitching the tape together for 36" on one side of the apron. Then stitch it to one armhole for 12" approximately. Then leave 24" (or less if you're smaller) for the loop around the neck, but keep stitching the tape together. Then stitch the tape to the other armhole for about 12". Then finish the apron string for the final 36". (Tip: I start by centering the tape at the nape of the neck. Then I pin it to the apron at the neck edges where the armhole begins. This way, I know that the ties are the same length on both sides.)

The neck and armhole connection should look like this:


I think you get the idea. Have fun and remember, there are no mistakes. Only learning opportunities!

Post-script: I added a double-width pocket to both of the aprons in the photos. Because they're the kind of aprons you wear when you're making something and you always need pockets when you're making something, am I right?


Monday, November 21, 2016

20/2 Silk, Painted Warps, 12 Harnesses, Echo and Jin (this headline has no verb)


Actually, this headline is a list of my favorite things. I love weaving with two painted silk warps: When you beam them together and then thread them A-B-A-B, you can weave fabrics with subtle and beautiful color shifts -- an effect I like to call "color play."

And then there's Jin: a structure that produces excellent drape in your fabric and allows for expressive patterns as well. AND when you use an extended parallel threading, all you have to do is alter your tieup and treadling to get Echo -- a design technique that works beautifully when you want to combine two painted warps on your loom.

In the photo above, the Jin appears in the lower half and the Echo appears in the upper half. To me, they flow together nicely, in part because I used the same treadling as I shifted into Echo. All I did was eliminate the tabby treadling that's needed for Jin and change the tieup. (Easy to do on a table loom, much harder to do on my floor loom, another argument to get a computer dobby loom...)

Here's the Echo drawdown.


Here's the drawdown for the Jin pattern. Basically, I designed an advancing point twill on an extended parallel threading. (It's easy to do with weaving software. In Fiberworks, for instance, all you do is click on "parallel repeat" in the "Warp" menu and choose how many shafts you want between the two different lines of threading.)


On the loom, it played out like this (keeping in mind that I changed my 60/2 silk weft from olive to orange about halfway up in the photo):


I even like the plain-weave treadling (which weaves as a faux basket weave, as you can't achieve true plain weave with these structures).


See the floating warp thread on the right? That error made me think that I should adjust the tieup to give the fabric some serious warp floats, so that I can create an "eyelash" effect in the fabric. My plan is to mix it up when I weave the final yardage, going from Jin to Echo to faux basket weave with eyelash accents.

The takeaway from this blog post is really that old cliche: Sample, sample, sample! By the way, let me know if you want me to send you copies of the drawdowns. Happy Thanksgiving!


Wednesday, November 16, 2016

How Do You Weave This Collapse Scarf? There's a Surprise at the End....


Sometimes when you see something beautiful, you can't get it out of your mind. Which is the case for me with this silk scarf woven by British weaver Sally Weatherill (shown above in detail). I came upon it maybe 3 years ago when I took a workshop with Ann Richards at the Handweavers Studio and Gallery in London.

Here's what I gathered from the photo. Simple fact: It's silk, probably 60/2 silk, in double weave. With two different blocks -- one threading for the blue/green horizontal stripes and one threading for the red/purple. A twill threading, probably a 3/1 tieup.

Too many shafts for my loom, as I have only 12 (a large Macomber and a Leclerc Voyageur table loom). So, for starters, I can't weave a sample in 3/1 twill blocks. Fine with me; I will weave plain weave instead.

Second problem: There is no way I can achieve that small blue/green block in the center of the fabric without adding another block of threading. (That's because the wefts in the red/purple block are discontinuous, right? That weft would have to go in between the middle blue/green block.)

So here's what I came up with.


I used 20/2 cotton on shafts 1 through 4 and 9 through 12 and then 18/2 merino on shafts 5 through 8. I did not like the sample at all (so I won't even post a photo). The weft was 20/2 cotton. The sett was too loose -- so loose that, even after fulling in soap and hot water, the cotton looked like cheesecloth underneath the section where the wool shrank.

Next sample. I decided to tighten up the sett and eliminate the middle block of the warp -- thereby reducing the sample to 8 shafts.


Getting there! Here's how the sample looked.


Still not working well, however. Too messy where the wool warp floats over the merino weft. So I tried weaving the wool block in plain weave right along with the blocks of cotton. Here's the altered draft.

Here are the results. Much better.


I still didn't like the way the cotton plain weave cloth looked after finishing. Maybe it was the matte finish (even though it's pearl cotton). I decided to try superwash wool along with the 18/2 merino, so that the merino would shrink while the superwash wouldn't. I looked at my JaggerSpun color samples and found a red that looked the same in both superwash and merino. The blacks in both yarns matched fine, as you might expect. Here's what the sample looked like before and after finishing.


I like this, but some tweaking is still in order. In any event, I promised a surprise at the end of this post. So, going back to the source of inspiration: the gorgeous silk scarf in blue/green and red/purple double weave stripes.

Remember how I set out to figure out the structure? And it took me three different samples to find something even remotely pleasing -- not to mention the fact that I didn't really figure out the original structure?

Well, through the Complex Weavers Collapse Weave Study Group I have been in touch with Wendy Morris -- a gifted weaver who, at the time I visited the Handweavers Studio and Gallery in London, owned and managed the place. I wrote an article for our study group newsletter discussing the scarf and my efforts to copy it and she wrote me back with this surprise: The scarf was woven SIDEWAYS. Those beautiful red/purple layers are woven horizontally. THAT'S how the weaver achieved the gap in the middle.

Thinking out of the box. I will try always to remember to look at something from a different angle! Thank you, Wendy -- and thanks to Sally Weatherill for designing and weaving the gorgeous piece that got me started on this quest. Here's the draft, for your weaving wonderment.


Name Drafts Aren't Just for Overshot....

  Above is a name draft using -- why not? -- the name Michelangelo, employing an Echo threading and a twill tieup and treading. A name draft...